Ensuring your home’s safety hinges on the reliable function of your smoke detectors. These silent guardians protect against devastating fires, but like any device, they can malfunction. Understanding common issues and troubleshooting techniques empowers you to maintain optimal home safety, preventing potential catastrophes and giving you peace of mind. This guide will equip you with the knowledge to diagnose and resolve eight frequently encountered problems with your smoke detectors, helping you keep your family safe.
From persistent chirping to complete non-responsiveness, we’ll explore a range of issues, providing clear explanations and practical solutions. We will cover preventative maintenance, battery testing and replacement, cleaning procedures, and even addressing more complex problems related to wiring and faulty units. By following the steps Artikeld here, you can confidently maintain your smoke detectors, ensuring they remain vigilant protectors of your home.
Identifying Common Smoke Detector Issues
Smoke detectors are crucial for home safety, providing early warnings of potentially life-threatening fires. However, malfunctioning detectors can render them useless, leaving your home vulnerable. Understanding common problems and implementing preventative measures can significantly improve their reliability and effectiveness.
Eight Common Smoke Detector Problems
Several factors can lead to smoke detector malfunctions. These issues range from simple fixes like replacing a dead battery to more complex problems requiring professional attention. Addressing these issues promptly is essential for maintaining optimal home safety.
| Symptom | Cause | Solution | Severity |
|---|---|---|---|
| Non-responsive detector | Dead battery, faulty wiring, internal malfunction | Replace battery, check wiring, replace detector | High |
| False alarms (frequent chirping) | Dust accumulation, insects, low battery, end-of-life | Clean detector, replace battery, replace detector | Medium |
| Intermittent alarms | Loose wiring, failing internal components | Check wiring, replace detector | Medium |
| No alarm during a test | Dead battery, faulty internal components | Replace battery, replace detector | High |
| Delayed alarm activation | Old or failing sensor, low battery | Replace battery, replace detector | High |
| Weak alarm sound | Low battery, failing speaker | Replace battery, replace detector | Medium |
| Constant chirping, even with new battery | End-of-life, internal malfunction | Replace detector | High |
| Alarm triggered by non-smoke sources (e.g., steam) | Incorrect detector type (e.g., ionization instead of photoelectric) | Consider installing a different type of detector appropriate for the environment. | Medium |
Preventative Maintenance Steps
Regular maintenance significantly reduces the likelihood of smoke detector malfunctions. Implementing these simple steps ensures your detectors remain reliable and effective.
The following five steps are crucial for preventative maintenance:
- Monthly testing: Press the test button on each detector to ensure it’s functioning correctly.
- Battery replacement: Replace batteries annually, or sooner if the detector chirps indicating low battery. Use only the recommended battery type.
- Regular cleaning: At least once a year, vacuum or gently brush the detector to remove dust and debris that can interfere with its operation.
- Inspect wiring (if hardwired): Visually inspect the wiring connections for any damage or looseness. Consult a professional electrician if you have concerns.
- Detector replacement: Replace smoke detectors every 10 years, regardless of their apparent condition. Smoke detector technology and components degrade over time.
Troubleshooting a Non-Responsive Detector
A flowchart can provide a systematic approach to troubleshooting a non-responsive smoke detector.
The following flowchart illustrates the steps:
Start –> Check Battery –> Battery Dead? –> Yes: Replace Battery –> Test Detector –> Detector Working? –> Yes: Problem Solved –> No: Proceed –> Check Wiring (if hardwired) –> Wiring Loose or Damaged? –> Yes: Repair Wiring or Consult Electrician –> Test Detector –> Detector Working? –> Yes: Problem Solved –> No: Replace Detector –> End
Troubleshooting Techniques for Specific Problems
Addressing common smoke detector issues often involves straightforward troubleshooting. Understanding the specific problem and applying the correct technique is key to restoring the functionality and safety provided by your smoke detectors. This section details practical steps to resolve some frequently encountered problems.
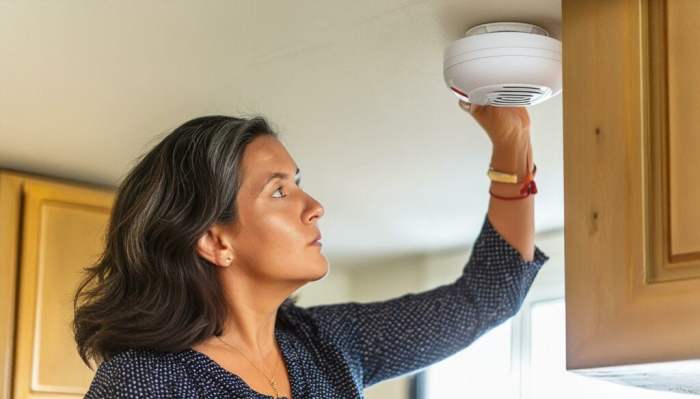
Testing Smoke Detector Batteries and Identifying Low Battery Symptoms
Regular battery testing is crucial for ensuring your smoke detectors are operational. A low battery can significantly reduce the detector’s sensitivity, potentially delaying an alarm during a fire. Most smoke detectors have a built-in test button. Pressing this button should trigger a short alarm sound, confirming both power and functionality. If the alarm is weak or absent, or if the detector emits a series of chirps, this strongly indicates a low battery. A visual inspection of the battery itself can also confirm its condition; swelling or leakage are clear signs of failure and necessitate immediate replacement. Remember to consult your smoke detector’s manual for specific testing instructions.
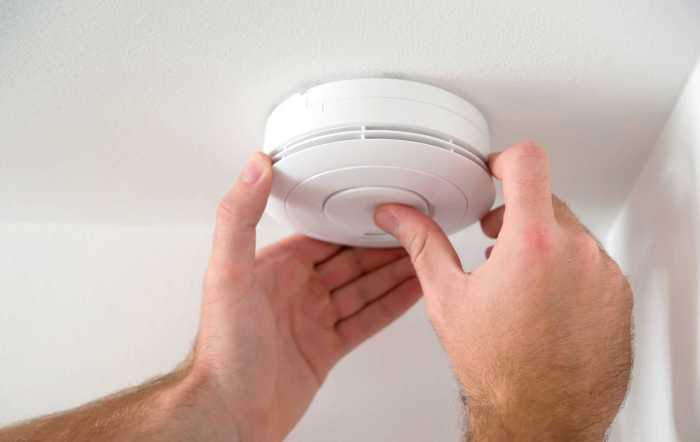
Cleaning a Smoke Detector
Dust and debris accumulating on the smoke detector’s sensors can impede its ability to detect smoke particles effectively. Regular cleaning, ideally every six months, is vital for maintaining optimal performance. To clean, first, disconnect the power source—either by removing the battery or turning off the power at the breaker box. Then, use a soft brush or a slightly damp (not wet) cloth to gently wipe the sensor chamber and the exterior of the unit. Avoid using harsh chemicals or abrasive cleaners. After cleaning, reassemble the detector and test its functionality using the test button. Consistent cleaning ensures your smoke detector’s sensors remain unobstructed and responsive.
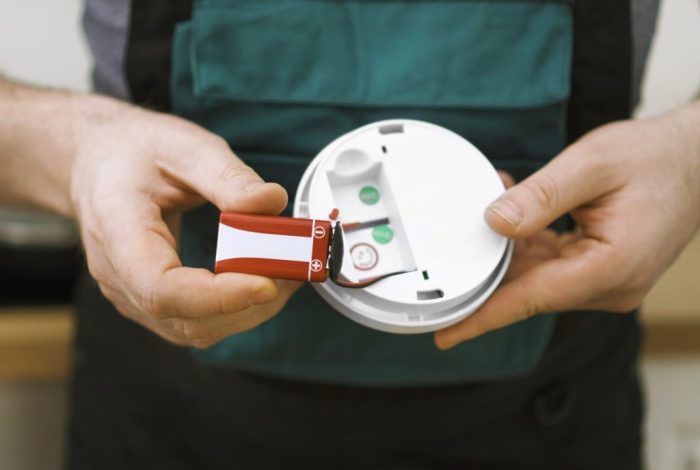
Replacing a Smoke Detector Battery
Replacing the battery is a simple yet essential maintenance task. First, locate the battery compartment, typically on the back of the unit. Open the compartment and remove the old battery. Note the type and voltage of the battery (usually a 9-volt battery) to ensure you replace it with an identical one. Insert the new battery, ensuring correct polarity (+ and – terminals align). Close the battery compartment and test the detector to confirm it’s working correctly. Using a battery with the correct voltage is critical for proper functionality; incorrect voltage can damage the unit or lead to unreliable operation.
Addressing a Continuously Chirping Smoke Detector
A continuously chirping smoke detector is a common indication of a problem, but it’s important to distinguish between the causes. The most frequent cause is a low battery. As discussed previously, replacing the battery should resolve this. However, if the chirping persists after battery replacement, it could indicate other issues, such as a malfunctioning sensor or a problem with the internal circuitry. In such cases, it’s advisable to consult the manufacturer’s instructions or consider replacing the entire smoke detector. Ignoring a persistent chirp can compromise the safety provided by the detector. Regular maintenance and prompt attention to warning signs are crucial for ensuring effective fire safety.
Advanced Troubleshooting and Solutions

Addressing persistent smoke detector issues often requires a more in-depth approach than basic troubleshooting. This section details advanced techniques for identifying and resolving complex problems, ensuring the reliable operation of your home’s safety system. Understanding electrical connections and proper unit replacement are crucial aspects of this process.
Faulty Wiring and Electrical Connections
Identifying faulty wiring or electrical connections is a key step in advanced smoke detector troubleshooting. Loose wires, damaged wiring, or incorrect connections can prevent the detector from functioning correctly, leading to false alarms or complete failure to activate. A visual inspection is the first step. Carefully examine all wires connected to the smoke detector, looking for any signs of damage, such as fraying, burning, or loose connections. Pay close attention to the points where the wires connect to both the detector and the power source. If any damage is visible, it’s crucial to replace the affected wires, ensuring proper insulation and secure connections. If you’re unsure about handling electrical wiring, consult a qualified electrician. Using a multimeter to test the voltage at the connection points can further confirm whether power is reaching the detector. A reading of 0 volts indicates a break in the circuit.
Replacing a Malfunctioning Smoke Detector
Replacing a malfunctioning smoke detector is a straightforward process, but safety precautions should be taken. First, turn off the power to the circuit at the breaker box to prevent electrical shock. Next, carefully remove the smoke detector from its mounting bracket, usually by twisting it slightly. Inspect the wiring at the mounting location; if the wires are damaged, they should be replaced before installing the new unit. The new smoke detector should have a similar wiring configuration. Match the wires to their corresponding terminals on the new detector, ensuring a secure connection. Finally, mount the new detector securely to the bracket and restore power to the circuit. Test the new detector to confirm it is functioning correctly.
Causes for Smoke Detector Failure During Simulated Smoke Test
A smoke detector failing to activate during a simulated smoke test can indicate several potential problems. One common cause is a depleted battery, particularly in battery-powered units. Another is a malfunctioning sensor, which may be clogged with dust or debris. Sometimes, the detector itself might be faulty, requiring replacement. Incorrect installation, such as improper wiring or placement, can also lead to failure. Finally, the simulated smoke used in the test might not be sufficient to trigger the alarm. Always use a commercially available smoke test aerosol, following the instructions carefully. If the detector fails to activate after addressing these potential issues, it is advisable to replace the unit.
Smoke Detector Installation and Functionality Checklist
A comprehensive checklist ensures proper installation and functionality. This includes verifying the detector’s placement, ensuring it’s at least 10 feet away from cooking appliances to minimize false alarms. It also involves confirming that the detector is securely mounted and correctly wired, with a functional battery (if applicable). A test of the alarm’s functionality using the test button is critical. Finally, the detector should be checked for any visible signs of damage, and a regular maintenance schedule should be established. This includes cleaning the detector’s sensor every six months to remove dust and debris. Following this checklist minimizes the risk of malfunction and maximizes the effectiveness of your smoke detection system.
Wrap-Up
Maintaining functional smoke detectors is crucial for home safety. By understanding the common problems discussed, and implementing the preventative maintenance and troubleshooting techniques Artikeld in this guide, you can significantly reduce the risk of fire-related incidents. Remember, regular checks and prompt attention to any unusual behavior are key to ensuring your smoke detectors remain effective guardians of your home and family. Don’t hesitate to consult a qualified electrician if you encounter persistent problems beyond your capabilities.