A gas leak poses a significant safety risk, demanding immediate attention. Identifying the source quickly and accurately is crucial. This guide Artikels seven effective methods to diagnose a gas leak in your line, ranging from simple visual inspections to advanced detection techniques. Understanding these methods empowers you to address potential hazards promptly and safely.
From the readily available soap bubble test to sophisticated infrared cameras, each method offers a unique approach to pinpointing the leak’s location and severity. We’ll explore the pros and cons of each, enabling you to choose the most appropriate technique based on your situation and resources. Safety precautions are emphasized throughout, ensuring a responsible and informed approach to gas leak detection.
Visual Inspection Methods

Visual inspection is the first and often simplest method for detecting gas leaks. While it won’t detect all leaks, it’s a crucial initial step that can quickly identify obvious problems and prevent further escalation. This method involves carefully examining your gas lines and appliances for visible signs of leakage.
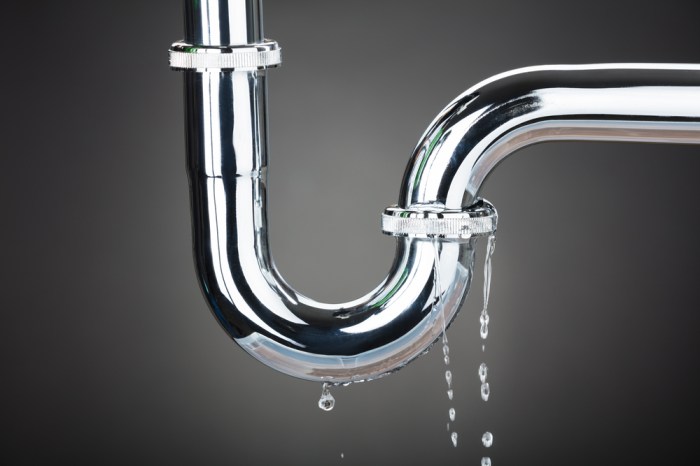
Visual inspection should focus on all accessible parts of your gas lines, including connections, fittings, and appliances. Pay close attention to areas where pipes are joined, as these are common points of failure. Look for signs of corrosion, damage, or unusual wear.
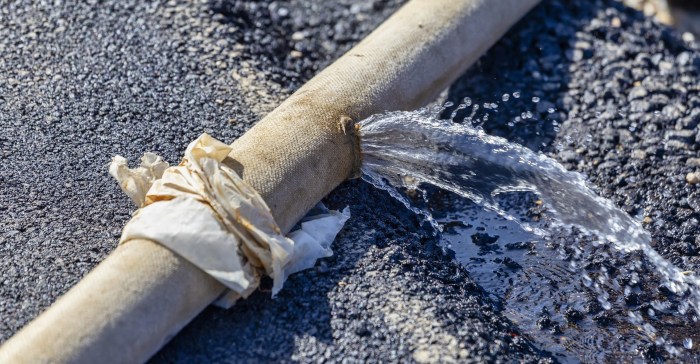
Gas leaks can manifest in several ways. A visible leak might show as bubbling in a soapy water solution applied to suspected areas. The escaping gas will create bubbles as it passes through the water. Another indication is a hissing sound, which is often subtle and might require careful listening. A strong smell of gas is also a clear warning sign, although natural gas is often odorless and an additive (mercaptan) is added to make leaks detectable. However, even with the additive, some individuals may not be able to smell the gas.
Signs of Gas Leaks
A visual inspection should encompass several key areas. Inspecting the gas meter itself for any damage or unusual activity is important. Check all gas line connections, both above and below ground if accessible. Pay close attention to any areas where the pipes have been repaired or modified in the past. Finally, inspect all gas-powered appliances for any signs of damage or leakage around the gas connection points.
Leak Indication, Location, Severity, and Recommended Action
| Leak Indication | Location | Severity | Recommended Action |
|---|---|---|---|
| Bubbling in soapy water test | Gas meter connection | Low | Tighten connection (if possible), call a qualified gas technician. |
| Hissing sound near appliance | Gas stove connection | Medium | Turn off gas supply immediately, call a qualified gas technician. |
| Visible crack in pipe | Underground gas line (visible portion) | High | Evacuate the area immediately, call emergency services and a qualified gas technician. |
| Strong odor of gas | Near furnace | Medium | Ventilate the area, turn off gas supply immediately, call a qualified gas technician. |
| Discoloration or rust on pipe | Gas line near foundation | Low to Medium | Monitor closely, consider professional inspection for potential corrosion. |
Pressure Testing and Specialized Tools
Locating gas leaks requires more than just visual inspection; pressure testing and specialized tools offer a more comprehensive and accurate approach. These methods are crucial for identifying leaks in areas inaccessible to visual inspection, such as underground lines or within walls. Safety precautions are paramount throughout the entire process, given the hazardous nature of natural gas.
Pressure testing involves pressurizing the gas line beyond its normal operating pressure to reveal any leaks. This procedure requires shutting off the gas supply to the affected section of the line and then using a pump to increase the pressure within the system. The pressure is carefully monitored using a manometer, a device that measures pressure differences. Any significant pressure drop indicates a leak. Before commencing, always ensure that the area is well-ventilated and that you have the necessary safety equipment, including eye protection and gloves. Never attempt a pressure test without proper training and understanding of gas handling procedures.
Gas Leak Detector Operation and Results Interpretation
Gas leak detectors utilize sensors to identify the presence of gas molecules in the air. Electronic detectors often employ sensors that react to the presence of specific gases, such as methane, and generate an audible or visual signal indicating the concentration of the gas. The intensity of the signal typically correlates with the leak’s severity. Proper calibration is essential for accurate readings, and the instructions provided by the manufacturer should be carefully followed. A steady, consistent signal may point to a consistent leak, while fluctuating signals might indicate an intermittent problem. Always refer to the detector’s manual for specific interpretation guidelines.
Comparison of Gas Leak Detector Types
Several types of gas leak detectors exist, each with its strengths and weaknesses. Choosing the right tool depends on the specific application and the level of accuracy required.
- Electronic Gas Leak Detectors: These detectors offer a highly sensitive and accurate method for detecting leaks. They are particularly useful for locating small leaks that might be difficult to find using other methods. They often provide a digital readout of the gas concentration, allowing for quantitative assessment of the leak.
- Soap Bubble Solution: This is a simple and inexpensive method that is effective for detecting larger leaks. Applying a soapy water solution to suspected leak points will create bubbles if gas is escaping. The size and rate of bubble formation can give a qualitative indication of the leak’s severity. This method is less precise than electronic detectors and may not be suitable for detecting very small leaks.
Manometer Usage for Gas Line Pressure Checks
A manometer is a crucial tool for pressure testing. Accurate usage ensures reliable results.
- Preparation: Ensure the gas line is isolated from the main supply and depressurized. Connect the manometer securely to a pressure test port on the gas line.
- Pressurization: Use a suitable pump to slowly increase the pressure within the gas line. Monitor the manometer closely to track the pressure.
- Observation: Observe the manometer’s reading for any significant pressure drop over time. A consistent drop suggests a leak.
- Leak Location: If a leak is detected, carefully examine the gas line for signs of damage or corrosion. The location of the pressure drop often correlates with the leak’s position.
- Depressurization: Once the test is complete, slowly depressurize the gas line before reconnecting it to the main supply.
Advanced Detection Techniques
When visual inspection and pressure testing prove insufficient, advanced detection techniques offer a higher degree of precision in pinpointing gas leaks. These methods leverage sophisticated technology to identify even the smallest leaks, improving safety and efficiency. This section details the application and interpretation of data from ultrasonic leak detection and infrared thermography.
Ultrasonic Leak Detection Methods for Gas Lines
Ultrasonic leak detection utilizes the principle that escaping gas produces high-frequency sound waves beyond the range of human hearing. A specialized ultrasonic detector, equipped with a sensitive microphone, picks up these sounds and converts them into audible signals or visual readings. The intensity of the signal correlates directly with the size and pressure of the leak. Operators move the detector along the gas line, listening for changes in the signal strength. The location of the strongest signal indicates the leak’s approximate position. This method is particularly effective for detecting leaks in hard-to-reach areas or buried lines, where visual inspection is impractical. The detector’s sensitivity allows for the identification of very small leaks that might otherwise go unnoticed. For example, a pinhole leak in a high-pressure line, while seemingly insignificant, can be easily detected with an ultrasonic detector, preventing potential hazards.
Infrared Camera Use for Gas Leak Detection
Infrared (IR) cameras detect temperature differences. When gas escapes under pressure, it undergoes adiabatic expansion, resulting in a noticeable temperature drop at the point of leakage. An infrared camera, sensitive to these temperature variations, visualizes this drop as a distinct thermal signature. The image produced shows variations in temperature, with cooler areas (represented by different color palettes, typically blue or purple) indicating potential gas leaks. The advantage of this method lies in its non-invasive nature and ability to scan large areas quickly. However, environmental factors such as ambient temperature and wind conditions can influence the accuracy of the readings. For example, a strong wind could dissipate the cooled gas quickly, making detection more challenging. Also, the effectiveness of IR cameras is diminished in environments with significant background thermal noise.
Comparison of Advanced Detection Techniques
The choice of advanced detection method depends on several factors. The following table compares ultrasonic leak detection, infrared thermography, and other advanced techniques.
| Technique | Cost | Accuracy | Accessibility |
|---|---|---|---|
| Ultrasonic Leak Detection | Moderate | High (for pinpoint accuracy) | Moderate (requires specialized equipment) |
| Infrared Thermography | High (for high-resolution cameras) | Moderate (affected by environmental factors) | Moderate (requires specialized equipment and expertise) |
| Gas Chromatography | High | Very High | Low (requires laboratory analysis) |
| Tracer Gas Detection | Moderate | High | Moderate (requires introduction of a tracer gas) |
Interpreting Data from Advanced Leak Detection Equipment
Interpreting data from ultrasonic detectors involves identifying areas with significantly increased sound intensity. The strength of the signal, often displayed numerically or graphically, directly correlates with the leak size. For infrared cameras, the interpretation involves identifying areas with noticeably lower temperatures than the surrounding environment. The size and shape of the cold spot can provide clues about the leak’s nature and severity. In both cases, careful attention to background noise and environmental factors is crucial for accurate interpretation. For instance, a slight temperature drop in a region might not necessarily indicate a leak, but rather a variation in the material’s thermal properties. Similarly, background noise in an ultrasonic reading could mask a small leak. Proper training and experience are essential for accurate data interpretation and minimizing false positives.
Last Point
Successfully diagnosing a gas leak requires a systematic approach, combining careful observation with the appropriate tools and techniques. By understanding the seven methods detailed here—from visual inspections to advanced technologies—you can effectively identify and address gas leaks, mitigating potential hazards and ensuring the safety of your home or business. Remember to prioritize safety and, if unsure, always consult a qualified gas professional.