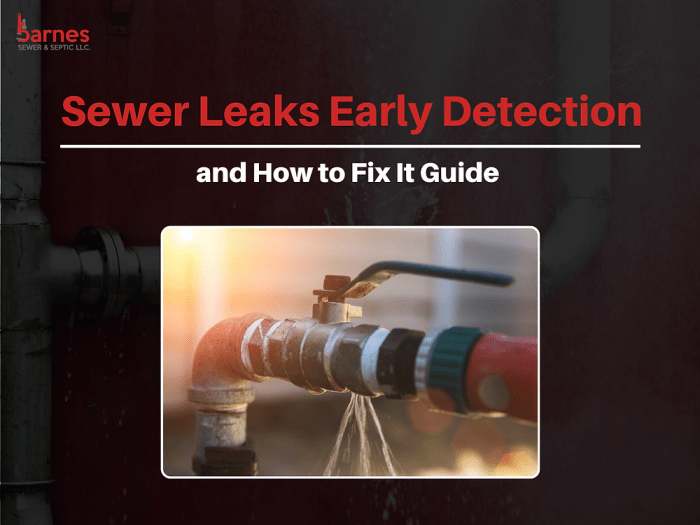
A persistent sewer line leak can lead to significant property damage and costly repairs. Understanding how to diagnose the problem quickly is crucial. This guide explores seven effective methods, ranging from simple visual inspections to sophisticated technological solutions, empowering homeowners to identify and address sewer line leaks efficiently and effectively. We’ll cover everything from DIY techniques to professional-grade approaches, helping you determine the best course of action for your specific situation.
From the readily accessible visual inspection to the more advanced ground-penetrating radar, each method offers unique advantages and limitations. We’ll examine the strengths and weaknesses of each approach, providing a comprehensive understanding of how to choose the right diagnostic tool for the job. This detailed guide will equip you with the knowledge to make informed decisions about sewer line leak detection and repair.
Visual Inspection Methods
Visual inspection is often the first step in diagnosing a sewer line leak. It’s a relatively inexpensive and non-invasive method that can quickly identify obvious problems, saving you time and money before resorting to more complex and costly diagnostic techniques. Careful observation of your property can reveal telltale signs of a leak, even before significant damage occurs.
Inspecting Your Property for Signs of Sewer Line Leaks
A thorough visual inspection of your property should encompass landscaping, pavement, and building foundations. Look for signs of wet or saturated soil, unusual plant growth (lush green patches in otherwise dry areas), cracks or settling in pavements, and dampness or staining on building foundations. These indicators suggest potential water leakage, possibly from a compromised sewer line.
| Location | Signs of Leakage | Severity Level | Recommended Action |
|---|---|---|---|
| Landscaping | Saturated soil, unusually lush vegetation, dying plants, persistent puddles | Medium to High | Further investigation with a sewer camera or other diagnostic methods |
| Pavement | Cracks, settling, sinking, bubbling asphalt | Medium to High | Contact a plumber for professional assessment and repair |
| Building Foundations | Dampness, staining, efflorescence (white, powdery deposits), musty odor | Low to Medium | Inspect for cracks and consult a structural engineer if needed; further sewer line inspection may be necessary |
| Indoor Plumbing | Slow draining sinks or toilets, gurgling sounds from drains, sewage backups | High | Immediate professional assistance required |
Using a Sewer Camera to Inspect the Sewer Line
A sewer camera inspection offers a more detailed view of the sewer line’s interior. This relatively inexpensive method allows for direct visualization of the pipe’s condition and can pinpoint the location of leaks. However, it requires some technical expertise or the hiring of a professional.
- Preparation: Locate the nearest cleanout access point to your sewer line. This is usually a capped pipe located outside your home. Clear the area around the cleanout to ensure easy access.
- Camera Insertion: Carefully remove the cleanout cap. Insert the sewer camera’s flexible cable into the cleanout, gently feeding it into the pipe. The camera’s feed should display on a monitor.
- Inspection: Slowly and steadily feed the cable deeper into the sewer line. Observe the video feed for any cracks, root intrusions, pipe collapses, or other damage that could be causing leaks. Note the location of any abnormalities.
- Documentation: Take photos or video recordings of any issues identified. This documentation is crucial for accurate reporting and repair planning.
- Cable Retrieval: Once the inspection is complete, slowly and carefully retract the camera cable from the sewer line. Replace the cleanout cap securely.
Limitations of Visual Inspection Methods
While visual inspections are valuable, they have limitations. They may not detect leaks in areas inaccessible to the camera, such as within solid ground or under substantial structures. Furthermore, subtle leaks or leaks within sections of pipe that are difficult to access may go undetected. They are also ineffective at identifying leaks within completely sealed pipes.
| Visual Inspection Technique | Pros | Cons |
|---|---|---|
| Property Surface Inspection | Inexpensive, easy to perform, identifies obvious problems | Limited depth of detection, only reveals surface manifestations of leaks |
| Sewer Camera Inspection | Direct visualization of the pipe interior, precise leak location | Requires specialized equipment, may not reach all areas of the sewer line, cannot detect leaks in sealed pipes |
Pressure Testing and Dye Testing Methods
Locating sewer line leaks can be challenging, but pressure and dye testing offer effective, non-invasive methods to pinpoint the problem’s source. These tests provide valuable information beyond visual inspections, helping determine both the leak’s location and its severity. They are often used in conjunction with other diagnostic techniques for a comprehensive assessment.
Pressure testing involves pressurizing the sewer line with air or water to detect leaks, while dye testing uses a non-toxic dye introduced into the system to visually trace its path and reveal any points of escape. Both methods offer distinct advantages and disadvantages, making the choice dependent on specific circumstances and the nature of the suspected leak.
Pressure Test Procedure
A pressure test requires specialized equipment and should ideally be performed by a qualified plumber. The procedure involves isolating the section of the sewer line under investigation, usually by using inflatable plugs or temporary seals. A pressure gauge is then connected to monitor the pressure within the line. Air or water is introduced, and the pressure is monitored for a set period. A drop in pressure indicates a leak. The rate of pressure drop can help estimate the severity of the leak. Safety precautions include wearing appropriate personal protective equipment (PPE), ensuring proper ventilation if using air, and taking care to avoid over-pressurizing the line which could cause damage. The location of the leak is often pinpointed by observing where the pressure drop is most significant or by using specialized listening devices to detect the escaping air or water.
Interpreting Pressure Test Results
Interpreting the results of a pressure test requires careful observation and analysis. A steady pressure reading indicates the absence of leaks within the tested section. A gradual pressure drop suggests a slow leak, possibly a hairline crack. A rapid pressure drop points to a more significant leak, potentially a large hole or a severely damaged section of pipe. The rate of pressure drop, along with the location where the pressure change is most noticeable, provides crucial information for determining the severity and location of the leak. For example, a slow pressure drop might indicate a minor crack requiring localized repair, while a rapid drop could signify a major break requiring extensive excavation and pipe replacement.
Dye Test Procedure
Dye testing offers a visual way to locate leaks. The following steps Artikel the process:
- Preparation: Access points to the sewer line are identified, typically cleanouts or other inspection points. The area surrounding the access points should be cleared for easy observation.
- Dye Introduction: A non-toxic, brightly colored dye is introduced into the sewer line through an access point. The type of dye used is important, as it must be visible and compatible with the sewer system’s materials.
- Water Flow: Water is then run through the system to carry the dye along the sewer line.
- Observation: Inspectors observe the ground surface along the sewer line’s path, looking for any signs of dye emerging from the soil. This indicates the location of the leak.
- Result Interpretation: The presence of dye at a specific location confirms a leak. The intensity of the dye’s color can sometimes provide an indication of the leak’s severity.
Comparison of Pressure and Dye Testing
Both pressure and dye testing offer valuable insights, but they have different strengths and weaknesses:
| Pressure Testing | Dye Testing |
|---|---|
| Advantages: Quantifies leak severity; can detect leaks in inaccessible areas; relatively quick | Advantages: Direct visual confirmation of leak location; less equipment intensive; can be used in conjunction with pressure testing |
| Disadvantages: Requires specialized equipment; may not pinpoint the exact leak location; can be affected by variations in ground conditions | Disadvantages: Less effective for pinpointing the severity of the leak; requires access points along the sewer line; can be affected by soil conditions; dye may not always be visible in all soil types |
Ground-Penetrating Radar (GPR) and Acoustic Leak Detection Methods

Ground-penetrating radar (GPR) and acoustic leak detection offer non-invasive methods for locating sewer line leaks, complementing visual and pressure testing techniques. These methods are particularly useful when leaks are suspected underground and difficult to access directly.
Ground-Penetrating Radar (GPR) Operation and Interpretation
Ground-penetrating radar utilizes electromagnetic pulses to create a subsurface image. A transmitter emits high-frequency radio waves into the ground; these waves reflect off subsurface features, including pipes and any voids or changes in material density indicative of leaks. A receiver detects these reflected signals, and specialized software processes the data to create a visual representation of the subsurface. Strong reflections from a pipe and weaker reflections or disruptions in the expected pipe signal might suggest a leak. The depth and location of these anomalies help pinpoint the leak’s position.
GPR Scan Diagram
Consider a simplified GPR scan representation:
“`
———————————-
| |
| Pipe Signal |
| ———————— |
| | | |
| | Weak Reflection | | <– Leak Indication
| | | |
| ———————— |
| |
| |
———————————-
Depth
“`
The continuous line represents the strong, consistent signal from the sewer pipe. The weaker, discontinuous line indicates a disruption in the signal, suggesting a leak. The vertical axis represents depth.
Acoustic Leak Detection Process and Leak Pinpointing
Acoustic leak detection relies on the principle that leaks generate acoustic noise. Specialized sensors are placed along the sewer line, either externally or internally, to detect these subtle sounds. The sensors transmit the acoustic signals to a data acquisition unit, which processes and analyzes the data. Sophisticated software algorithms pinpoint the location of the leak based on the signal’s strength and timing. The exact location is often determined by triangulation using multiple sensors.
Comparison of GPR and Acoustic Leak Detection
The choice between GPR and acoustic leak detection depends on several factors. The following table summarizes their advantages and disadvantages:
| Method | Advantages | Disadvantages |
|---|---|---|
| Ground-Penetrating Radar (GPR) | Can detect leaks at various depths; provides a visual representation of the subsurface; can identify other subsurface anomalies. | Can be affected by soil conditions; may not be effective in highly conductive soils; relatively expensive. |
| Acoustic Leak Detection | Highly sensitive to leaks; can pinpoint leaks precisely; relatively less expensive than GPR. | Requires access to the sewer line (either externally or internally); less effective in noisy environments; may not detect very small leaks. |
Last Point

Successfully diagnosing a sewer line leak requires a systematic approach, carefully considering the various methods available. While visual inspection offers a simple starting point, more advanced techniques like pressure testing, dye testing, GPR, and acoustic leak detection provide increasingly precise results. By understanding the capabilities and limitations of each method, homeowners can effectively pinpoint the location and severity of a leak, leading to faster repairs and minimized damage. Remember to always prioritize safety and consider professional assistance when necessary.