A malfunctioning dryer vent can lead to frustratingly long drying times, increased energy bills, and even serious fire hazards. Understanding the common causes and implementing effective troubleshooting steps is crucial for maintaining a safe and efficient laundry routine. This guide provides a practical, step-by-step approach to diagnosing and resolving dryer vent issues, ensuring your appliance runs smoothly and safely.
From identifying the source of the problem – be it lint buildup, obstructions, or kinks – to performing a thorough cleaning and inspection, we’ll cover the essential techniques to get your dryer back to optimal performance. We’ll also delve into preventative measures to avoid future malfunctions, saving you time, money, and potential safety risks.
Identifying the Problem
A malfunctioning dryer vent significantly impacts drying efficiency and can even pose safety risks. Understanding the common causes of these malfunctions is crucial for effective troubleshooting. Several factors can restrict airflow, leading to longer drying times, excessive heat, and potential fire hazards.
Dryer vent malfunctions primarily stem from restrictions in the airflow path. This restriction can be caused by a variety of issues, ranging from simple lint buildup to more serious obstructions. Lint accumulation is perhaps the most frequent culprit, gradually choking the vent and hindering the exhaust of hot, moist air. Kinks or collapses in the flexible venting material can also severely impede airflow. Furthermore, obstructions such as foreign objects – anything from small toys to nesting animals – can completely block the vent, creating a significant safety hazard. The type and location of the obstruction directly influence the severity of the problem and the resulting symptoms. For instance, a partial blockage might only lead to slightly longer drying times, while a complete blockage could cause the dryer to overheat or even fail to start.
Common Causes of Dryer Vent Malfunction
Lint buildup is the most prevalent cause of dryer vent problems. Over time, lint fibers accumulate on the interior walls of the vent, reducing its diameter and restricting airflow. This buildup acts as insulation, trapping heat and increasing the risk of fire. Kinks and collapses in flexible venting materials create significant airflow restrictions. These bends and compressions reduce the vent’s effective diameter, dramatically slowing down the exhaust process. Obstructions such as clothing items accidentally lodged in the vent, small toys, or even animal nests can completely block airflow, preventing the dryer from functioning correctly. Foreign objects can also damage the venting material, leading to further problems. The impact of these obstructions varies depending on their size, location, and the type of vent material. For example, a sock caught near the dryer’s outlet might only cause a slight reduction in airflow, whereas a completely blocked vent could lead to overheating and a potential fire hazard.
Symptoms of Various Dryer Vent Problems
Understanding the symptoms associated with different dryer vent problems helps pinpoint the source of the malfunction. The following table summarizes common symptoms, possible causes, severity levels, and recommended actions.
| Symptom | Possible Cause | Severity Level | Recommended Action |
|---|---|---|---|
| Slow drying times | Lint buildup, kinks, partial blockage | Low to Medium | Clean the vent and check for kinks. |
| Overheating dryer | Complete blockage, restricted airflow | Medium to High | Immediately stop using the dryer and inspect the vent for blockages. |
| Unusual noises (e.g., rumbling, whistling) | Obstruction, loose vent connections | Low to Medium | Check for loose connections and obstructions within the vent. |
| Dryer not starting | Complete blockage, faulty thermal fuse | High | Check for complete blockage. If blockage is cleared and dryer still does not start, contact a qualified technician. |
Step-by-Step Troubleshooting

Troubleshooting a malfunctioning dryer often involves a systematic approach, starting from the simplest checks and progressing to more involved inspections. This step-by-step guide will help you identify and resolve common dryer vent issues, leading to efficient and safe clothes drying. Remember to always disconnect the dryer from the power source before beginning any maintenance.
Inspecting the Dryer Vent Path
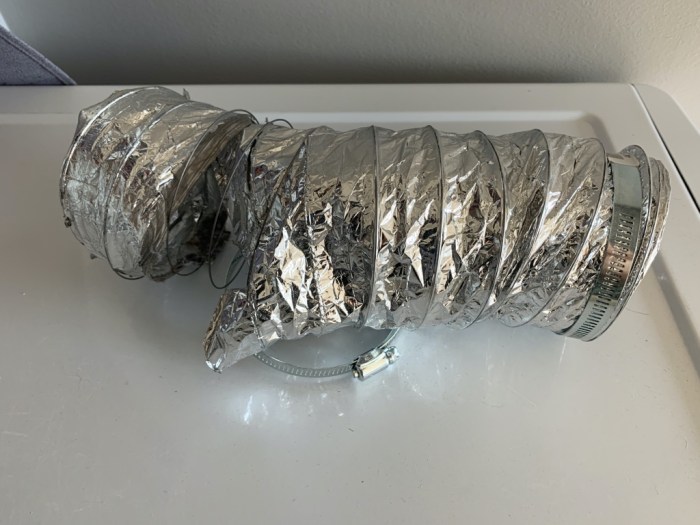
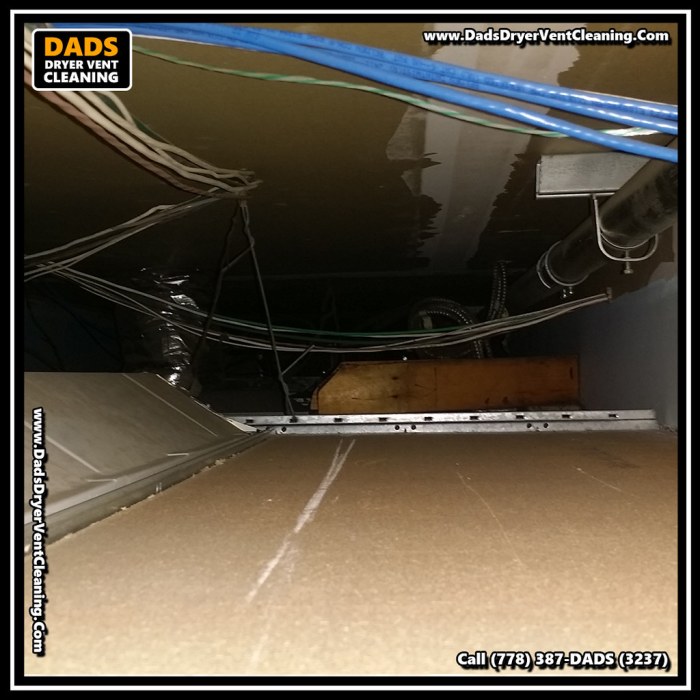
Begin by tracing the dryer vent’s path from the dryer’s exhaust port to the exterior vent. This involves visually inspecting the entire length of the vent, both internally and externally, to identify any potential blockages or damage. Start at the dryer’s back, examining the connection point for any looseness or debris. Follow the vent line, noting its material (rigid metal or flexible plastic) and condition. Look for bends, kinks, or areas where the vent might be crushed or compressed, restricting airflow. Pay close attention to the transition points, especially where the vent changes direction or diameter. If you have an attic access point, examine the vent path within the attic for any blockages or damage that might not be visible from the exterior. Finally, inspect the exterior vent cap to ensure it is securely attached and free from obstructions like bird nests or leaves. A thorough visual inspection is the first critical step in identifying the source of the problem.
Cleaning the Lint Trap
The lint trap is the first line of defense against lint buildup, and its regular cleaning is crucial for dryer efficiency and fire safety. To effectively clean the lint trap, first, disconnect the dryer from the power source. Then, open the lint trap door, usually located on the front of the dryer. Carefully remove the lint trap and inspect it for accumulated lint. Use your fingers or a soft brush to gently remove any loose lint. For stubborn lint, you might consider using a vacuum cleaner with a brush attachment to thoroughly clean the trap’s crevices. Once the lint trap is clean, inspect the trap’s housing for any lint accumulation. Use a soft brush or vacuum to remove any lint trapped within the housing. Before reinstalling the lint trap, visually check for any damage or wear and tear. A clean lint trap ensures optimal airflow and prevents fire hazards.
Cleaning the Dryer Vent
Cleaning the dryer vent itself is essential for maintaining proper airflow and preventing fire hazards. The method will vary slightly depending on whether you have a rigid or flexible vent. For rigid metal vents, you can use a long, flexible brush specifically designed for dryer vents. Insert the brush into the vent opening and push it through the entire length, rotating it to dislodge and remove lint buildup. For flexible plastic vents, a specialized vent cleaning kit with a rotating brush or a shop vacuum with a long, narrow attachment might be more effective. Always work from the dryer end toward the exterior vent to prevent pushing lint deeper into the system. For particularly stubborn blockages, you might need to disconnect sections of the vent for thorough cleaning. Remember to wear appropriate safety gear, including gloves and eye protection, while working with the dryer vent.
Checking for and Correcting Kinks and Blockages
After cleaning the vent, carefully inspect the entire length again for any remaining kinks, bends, or obstructions. Kinks in the flexible venting severely restrict airflow. If you find any kinks, try gently straightening them out. However, if the vent is severely damaged or crushed, replacement might be necessary. Blockages can occur anywhere along the vent’s path, so pay attention to any areas where the vent might be compressed against other objects or where the diameter changes abruptly. If you discover any significant blockages, carefully remove them using appropriate tools. Avoid using sharp objects that could damage the vent. Remember that a straight, unobstructed vent path is crucial for optimal dryer performance and fire safety.
Advanced Troubleshooting and Prevention
Proactive maintenance is key to preventing dryer vent malfunctions and ensuring the longevity of your appliance. Regular cleaning and careful attention to installation details significantly reduce the risk of fire hazards and inefficient drying cycles. Addressing potential problems before they escalate saves time, money, and frustration in the long run.
Regular dryer vent maintenance is crucial for preventing lint buildup, which is the primary cause of dryer vent malfunctions. This buildup not only reduces drying efficiency, increasing energy consumption and drying times, but also poses a significant fire risk. A clogged vent can overheat the dryer, potentially igniting the accumulated lint. The frequency of cleaning depends on factors such as the type of dryer, the frequency of use, and the length and material of the vent. However, at a minimum, a thorough cleaning should be performed at least once a year.
Dryer Vent Cleaning Methods
Several methods exist for cleaning dryer vents, each with varying degrees of effectiveness. Using a dryer vent cleaning brush, often sold with flexible extensions, allows for thorough cleaning of long and winding vents. This method is generally effective for removing most lint buildup, but it may not reach deeply embedded lint or remove blockages in difficult-to-access areas. Vacuuming the vent after using a brush can further improve cleaning effectiveness. Specialized tools, such as powered vent cleaning kits with rotating brushes, offer a more efficient and thorough cleaning than manual brushes, particularly for longer vents. These tools can reach areas that are difficult to access with a manual brush and often remove lint more effectively. However, the initial investment for these tools is typically higher.
Preventative Measures for Dryer Vent Malfunctions
Implementing preventative measures minimizes the likelihood of future dryer vent malfunctions. Choosing appropriate vent materials, such as rigid metal ducts instead of flexible plastic or foil vents, is a crucial step. Rigid metal ducts are less prone to collapsing or kinking, which can restrict airflow and cause lint buildup. Proper installation practices, including avoiding sharp bends, excessive length, and ensuring a secure connection between the dryer and the vent, are also essential. Regularly inspecting the vent for signs of damage or blockage is vital. This includes checking for any visible lint buildup, loose connections, or damage to the vent material.
Identifying Signs of Damaged or Improperly Installed Vents
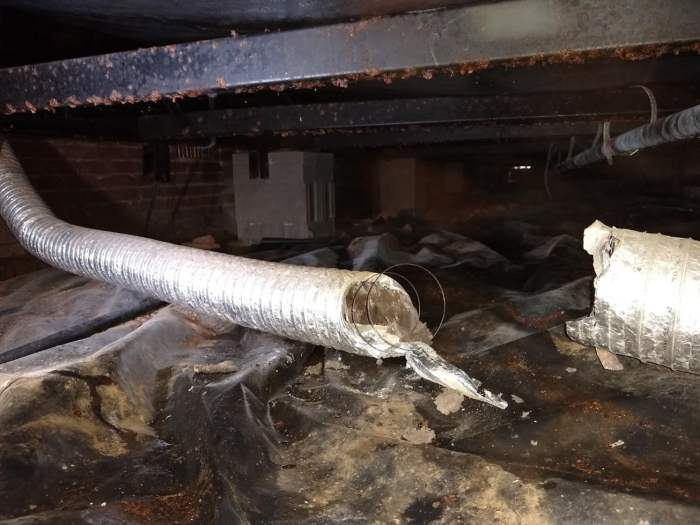
Identifying signs of a damaged or improperly installed vent requires careful observation and adherence to safety precautions. Always disconnect the dryer from the power source before undertaking any inspection or cleaning. Signs of damage include dents, kinks, or holes in the vent material, particularly in flexible vents. Improper installation is often indicated by excessive length, sharp bends, or loose connections. A significantly reduced airflow from the dryer vent or an unusually long drying time are indicators of potential problems. If you suspect any damage or improper installation, it’s recommended to consult a qualified professional for inspection and repair to avoid potential fire hazards.
Closing Notes
Addressing a malfunctioning dryer vent effectively involves a combination of careful inspection, thorough cleaning, and preventative maintenance. By following the steps Artikeld in this guide, you can restore your dryer’s efficiency, improve energy savings, and significantly reduce the risk of fire hazards. Remember, regular maintenance is key to preventing future problems and ensuring the longevity of your appliance. Taking proactive steps today will save you headaches and potential expenses down the road.