From a flickering bulb to a completely dark room, malfunctioning light fixtures can be frustrating. Understanding the common causes behind these issues empowers you to tackle the problem effectively, often saving time and money on costly repairs. This guide provides a straightforward approach to diagnosing eight frequent problems, guiding you through visual inspections, electrical checks, and component-specific troubleshooting.
We’ll cover everything from identifying a simple burned-out bulb to tackling more complex electrical issues. Learn how to safely inspect your fixtures, test for voltage, and understand the differences between tripped breakers and blown fuses. We’ll also delve into specific fixture problems, offering practical solutions for common malfunctions like flickering lights and ballasts needing replacement. By the end, you’ll be equipped to confidently troubleshoot most light fixture problems.
Identifying Fixture Problems
Before attempting any repairs, a thorough visual inspection is crucial for diagnosing light fixture issues. This process helps differentiate between a simple bulb replacement and a more complex electrical problem, preventing unnecessary work and potential hazards. Careful observation can pinpoint the source of the malfunction, guiding you towards the appropriate solution.
Visual Cues for Bulb Failure vs. Fixture Malfunction
A burned-out bulb is typically easily identified by a darkened filament or a lack of illumination when the switch is turned on. The surrounding fixture will appear normal, without any signs of damage or loose wiring. In contrast, a faulty fixture might exhibit several visual cues, such as flickering lights even with a new bulb, sparking, or a visibly damaged or loose wire connection within the fixture. The bulb itself may function correctly when tested in another fixture.
Safe Light Fixture Inspection
Before beginning any inspection, always ensure the power is completely switched off at the breaker box. Never rely solely on the light switch; turning off the breaker provides a crucial safety measure to prevent electrical shock. Once the power is off, carefully examine the fixture. Look for any obvious signs of damage, such as cracks, loose wires, or corrosion. Use a flashlight to illuminate hard-to-see areas. If you are uncomfortable working with electrical wiring, it’s always best to consult a qualified electrician.
Signs of Loose Wire Connections
Loose wire connections are a common cause of flickering lights, intermittent outages, and complete fixture failure. Flickering lights often indicate a poor connection where the wire is not making consistent contact. Intermittent outages suggest a connection that is occasionally broken, while a complete failure indicates a complete break in the circuit. These problems often present themselves visually as loose wires, exposed wiring, or blackened or burnt wire insulation.
Visual Cues and Troubleshooting
| Symptom | Possible Cause 1 | Possible Cause 2 | Troubleshooting Step |
|---|---|---|---|
| Flickering Lights | Loose wire connection | Faulty bulb | Tighten wire connections; replace bulb |
| Intermittent Outages | Loose wire connection | Damaged switch | Check and tighten wire connections; test switch functionality |
| Complete Fixture Failure | Broken wire | Faulty ballast (for fluorescent fixtures) | Inspect wiring for breaks; replace ballast if necessary |
| Dim Lights | Loose wire connection | Incorrect voltage | Tighten wire connections; verify voltage at fixture |
| Burning Smell | Overheated wire | Short circuit | Immediately turn off power at breaker; call electrician |
Troubleshooting Electrical Issues
Before attempting any electrical work, always ensure the power to the light fixture is completely switched off at the breaker box. Failure to do so could result in serious injury or death. This section details how to identify and resolve common electrical problems with your light fixtures.
Checking the Circuit Breaker and Testing Wiring
Circuit Breaker Inspection
To check if a tripped breaker is causing the light fixture malfunction, locate your home’s electrical panel (breaker box). The panel will contain a series of switches; each switch controls a specific circuit in your home. Carefully examine each switch, looking for any that are in the “off” position or are not fully clicked into the “on” position. If you find a breaker that is in the “off” position (usually indicated by a switch that is not aligned with the others), this suggests that the circuit has been tripped. Gently switch the breaker to the “on” position. If the light fixture now works, the problem was a tripped breaker. If the breaker immediately trips again, there may be a more serious short circuit within the wiring that requires professional attention.
Voltage Testing
Before testing the wiring of your light fixture, ensure that the power is switched off at the breaker box. Use a non-contact voltage tester to check for the presence of electricity at the fixture’s wiring terminals. A non-contact voltage tester is a safer alternative to a traditional voltage tester as it doesn’t require physical contact with the wires. If the tester indicates the presence of voltage, the problem may lie elsewhere in the circuit, or the breaker has not fully switched off. If there is no voltage, proceed to check the fixture’s wiring connections. A contact voltage tester should only be used by qualified electricians and requires careful adherence to safety procedures. Always use caution and follow the manufacturer’s instructions for your specific tester.
Fuse vs. Circuit Breaker
A blown fuse and a tripped circuit breaker both serve as safety mechanisms to protect your electrical system from overloads. However, they function differently. A fuse is a one-time use device that melts and breaks the circuit when excessive current flows through it. A tripped circuit breaker, on the other hand, is a reusable switch that automatically interrupts the circuit when an overload occurs. It can be reset by switching it off and then back on. To replace a blown fuse, first turn off the power to the circuit at the breaker box. Then, carefully remove the blown fuse and replace it with a fuse of the same amperage rating. Never replace a fuse with one of a higher amperage rating, as this could damage your electrical system.
Troubleshooting Electrical Problems Flowchart
The following flowchart illustrates the steps to troubleshoot electrical problems with a light fixture:
“`
[Start] –> Is the light fixture working? –> No –>
|
V
Is the power switched off at the breaker box? –> Yes –>
|
V
Check the circuit breaker for tripped breakers –> Tripped? –> Yes –> Reset breaker –> Is the light working? –> Yes –> [End] –> No –>
|
V
No –> Check wiring with voltage tester –> Voltage present? –> Yes –> Possible short circuit – call electrician –> No –>
|
V
Inspect wiring connections and fixture components –> Repair or replace as needed –> Is the light working? –> Yes –> [End] –> No –> Call electrician –> [End]
“`
Addressing Specific Fixture Problems
Understanding the specific symptoms of a malfunctioning light fixture is crucial for effective troubleshooting. Different problems manifest in distinct ways, requiring tailored solutions. This section will delve into common issues, comparing and contrasting their symptoms and offering practical solutions.
Flickering Light Fixture versus Non-Functional Fixture
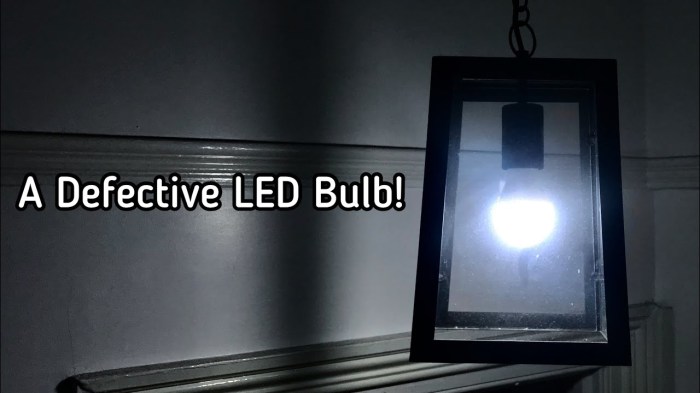
A flickering light fixture often indicates a loose connection, a failing bulb, or a problem with the ballast (in fluorescent fixtures). The flickering might be intermittent or constant, and the intensity of the light may vary. In contrast, a light fixture that doesn’t turn on at all suggests a more significant issue, such as a blown fuse, a tripped circuit breaker, a faulty switch, or a problem within the fixture itself, possibly a broken wire or a completely failed ballast. Troubleshooting a flickering light begins with checking the bulb and connections, while a non-functional fixture necessitates checking the power source (fuse box and circuit breaker) before inspecting the fixture’s internal wiring and components.
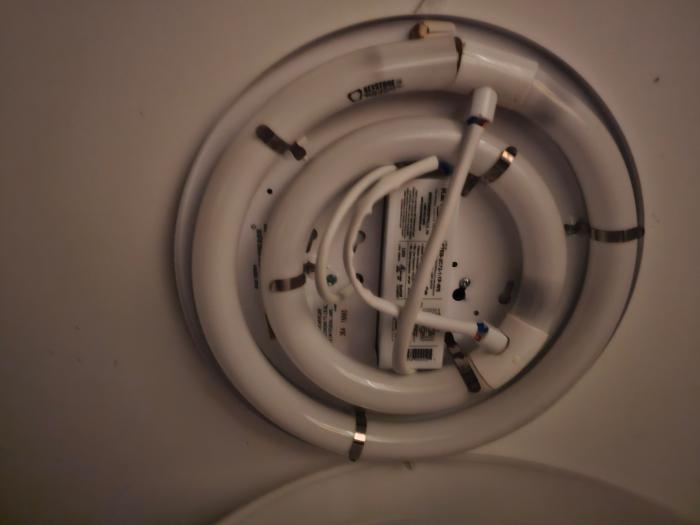
Replacing a Ballast in a Fluorescent Light Fixture
Replacing a ballast in a fluorescent light fixture requires caution and adherence to safety procedures. Before starting, always turn off the power at the breaker box. The ballast is typically a rectangular metal box located within the fixture. First, remove the fixture cover, exposing the ballast and other components. The ballast is usually connected to the fluorescent tubes and the fixture wiring via wire nuts or terminal blocks. Carefully disconnect these connections, noting the position of each wire. Once disconnected, the old ballast can be removed. Install the new ballast, ensuring that all wires are correctly reconnected according to the wiring diagram on the new ballast or the original fixture. After reconnecting everything, carefully replace the fixture cover and restore power at the breaker box. If the fluorescent tubes still do not light, verify all connections again and consider the possibility of a faulty tube.
Troubleshooting Common Light Fixture Components
Understanding the potential problems associated with each light fixture component is vital for effective troubleshooting. Addressing these issues systematically can save time and prevent further damage.
The following list Artikels common components and their associated problems and solutions:
- Bulbs:
- Problem: Bulb doesn’t light. Solution: Replace the bulb with a new one of the correct type and wattage.
- Problem: Bulb flickers. Solution: Check the bulb’s socket for loose connections; replace the bulb if the flickering persists.
- Problem: Bulb burns out frequently. Solution: Check the bulb’s wattage against the fixture’s rating; ensure proper ventilation to prevent overheating.
- Sockets:
- Problem: Loose or damaged socket. Solution: Tighten the socket screws; if damaged, replace the entire socket. This might involve some rewiring, depending on the fixture’s design. A damaged socket might look visibly burnt or loose.
- Ballasts (Fluorescent Fixtures):
- Problem: Fluorescent tubes don’t light or flicker. Solution: Replace the ballast. This involves disconnecting wires, removing the old ballast, and installing a new one of the correct type. Always disconnect power at the breaker before attempting this.
- Wiring:
- Problem: Loose or damaged wires. Solution: Carefully check all wire connections for looseness. Repair or replace any damaged wires, ensuring proper insulation. If unfamiliar with electrical wiring, consult a qualified electrician.
- Problem: Incorrect wiring. Solution: Trace the wiring carefully, comparing it to a wiring diagram if available. Reconnect wires according to the correct scheme. Consult a qualified electrician if you are unsure.
Closure
Successfully diagnosing and resolving light fixture issues offers a sense of accomplishment and can significantly improve your home’s functionality and ambiance. Remember safety is paramount – always turn off the power before working on any electrical components. By following the steps Artikeld in this guide, you can effectively identify and address a wide range of problems, ensuring your home is well-lit and functioning smoothly. With a little patience and these troubleshooting techniques, you can restore brightness to your space with confidence.