A malfunctioning heating system can lead to discomfort and increased energy bills. Pinpointing the source of a leak, however, can be challenging. This guide provides seven practical methods to help you effectively diagnose leaks in your heating system, from simple visual inspections to more advanced pressure testing techniques. Understanding these methods empowers homeowners to identify problems quickly, potentially saving money on costly repairs and ensuring a warm and comfortable home.
By systematically applying these diagnostic approaches, you can confidently locate the source of the leak, enabling efficient repairs and preventing further damage. This guide provides a step-by-step approach to each method, offering clear instructions and helpful tips for a successful diagnosis.
Visual Inspection Methods
Visual inspection is the first and often easiest method for detecting leaks in your heating system. It’s non-invasive and can quickly pinpoint obvious problems, saving you time and potentially costly repairs. A thorough visual check should be part of any regular heating system maintenance.
Visual inspection involves carefully examining all components of your heating system for signs of leaks. This includes checking for water stains, rust, corrosion, dampness, and physical damage. Remember to prioritize safety; turn off the system before beginning your inspection.
Pipe Inspection
Inspecting pipes involves systematically checking all visible pipes for signs of leaks. Look for water stains on walls or ceilings directly below pipes, which may indicate a slow leak. Check for rust or corrosion, particularly at joints and connections, as these are common points of failure. Also, examine the pipes for any physical damage, such as cracks or dents. Pay close attention to areas where pipes pass through walls or floors, as these are often vulnerable points. A flashlight can be helpful for illuminating hard-to-see areas.
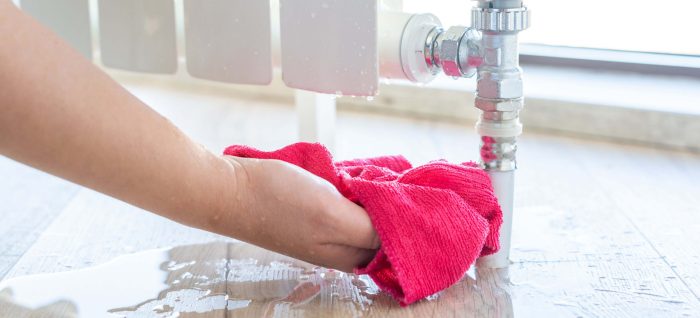
Radiator Inspection
Radiators are another common source of leaks. Look for water stains on the floor or walls beneath the radiator, indicating a leak. Check for rust or corrosion on the radiator itself, particularly around the valves and connections. Examine the radiator carefully for any signs of physical damage, such as dents or cracks. If you have a cast-iron radiator, be especially vigilant for cracks, as these can be difficult to spot but can lead to significant leaks.
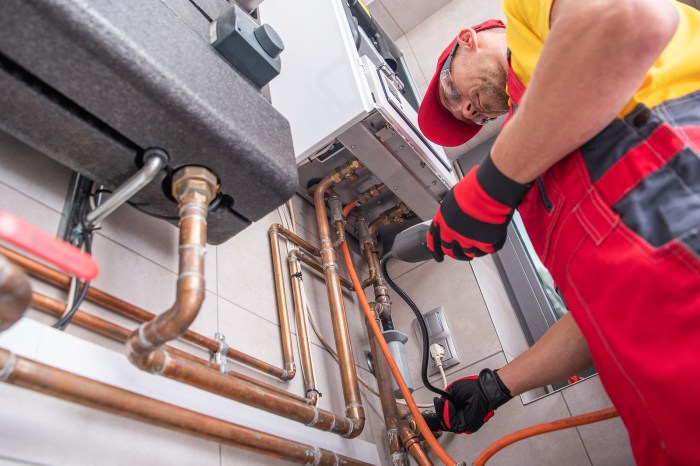
Boiler Inspection
Boiler inspections require more caution. Always ensure the boiler is turned off and cooled down before starting. Look for water stains or damp patches around the boiler, indicating potential leaks from the boiler itself or its connecting pipes. Inspect the boiler’s pressure gauge to check if it’s reading unusually low, suggesting a leak. Examine the boiler casing for any signs of rust, corrosion, or damage. Pay close attention to the boiler’s valves and connections, as these are common leak points.
Expansion Tank Inspection
The expansion tank is often overlooked, but it can also be a source of leaks. Look for any signs of water stains or dampness around the tank. Check the tank’s pressure gauge to ensure it’s within the recommended range. A significantly low pressure may indicate a leak. Inspect the tank for any cracks or damage to its casing.
Pump Inspection
Inspect the pump for any leaks around its seals or connections. Look for water stains or dripping water. Check the pump for any unusual noises or vibrations, which could indicate a problem that may lead to a leak.
| Component | Common Leak Signs | Inspection Method | Repair Recommendation |
|---|---|---|---|
| Pipes | Water stains, rust, corrosion, cracks, dents | Visual inspection, feel for dampness | Repair or replace affected sections of pipe |
| Radiators | Water stains, rust, corrosion, cracks, leaks around valves | Visual inspection, check for dampness | Repair or replace the radiator |
| Boiler | Water stains, low pressure, rust, corrosion | Visual inspection, check pressure gauge | Call a qualified heating engineer |
| Expansion Tank | Water stains, low pressure, cracks | Visual inspection, check pressure gauge | Repair or replace the expansion tank |
| Pump | Water stains, dripping water, unusual noises | Visual inspection, listen for unusual sounds | Replace seals or the pump itself |
Pressure Testing Techniques
Pressure testing is a crucial method for pinpointing leaks in a heating system that might be difficult to detect visually. This involves pressurizing the system with a known gas or liquid and observing for pressure drops, which indicate the presence of a leak. This method is particularly effective for detecting leaks in hidden or inaccessible areas of the system.
Pressure testing requires careful execution to ensure both accuracy and safety. Incorrect procedures can lead to inaccurate results or even damage to the system. The process involves several steps, from preparing the system to interpreting the results.
System Preparation and Safety Precautions
Before commencing pressure testing, several preparatory steps are essential. First, the heating system must be completely isolated from the main power source and allowed to cool completely. This prevents accidental burns or electrical hazards. Next, all valves within the system should be checked and secured to prevent unintended pressure release during the test. Appropriate Personal Protective Equipment (PPE) such as safety glasses and gloves should be worn throughout the process. The work area should be well-ventilated to prevent the buildup of any potentially hazardous gases used in the testing process. Finally, a pressure relief valve should be incorporated to safeguard against over-pressurization, preventing damage to the system or potential injury.
Isolating System Sections for Individual Testing
To efficiently locate leaks, it’s often beneficial to isolate sections of the heating system for individual pressure testing. This is achieved by carefully closing valves at strategic points within the system, effectively dividing it into smaller, manageable segments. This process allows for a more precise identification of the leak’s location. For instance, you might isolate a particular radiator loop or a specific section of pipework for targeted testing. This targeted approach saves time and resources by focusing the testing efforts on smaller areas. After isolating a section, the pressure test can be performed on that specific segment.
Comparison of Pressure Testing Methods
Several methods exist for pressure testing heating systems, each with its own advantages and disadvantages. Choosing the appropriate method depends on factors such as the system’s complexity and the type of leak suspected.
- Pressure Gauge Method: This involves using a simple pressure gauge attached to the system. Water is typically used as the pressurizing medium. The gauge monitors the pressure over a set period; a gradual drop indicates a leak. This method is relatively inexpensive and straightforward, but it might not be as sensitive as other techniques and is less suitable for detecting very small leaks.
- Nitrogen Pressurization: This technique uses nitrogen gas to pressurize the system. Nitrogen is inert and non-toxic, making it safer than using water, especially in systems containing corrosive materials or where there is a risk of water damage. The pressure is monitored with a pressure gauge. This method is highly sensitive and can detect even very small leaks, providing a more precise leak location than the water pressure method. However, it requires specialized equipment and is generally more expensive.
Listening and Feeling for Leaks

Detecting leaks in a heating system often involves more than just visual inspection. Auditory and tactile methods can be surprisingly effective in pinpointing the source of a leak, especially in hard-to-reach areas or when the leak is small and doesn’t produce readily visible signs of water damage. These methods rely on identifying subtle sounds and changes in temperature associated with escaping pressurized water or steam.
Listening for leaks involves carefully attending to unusual noises emanating from your heating system. A hissing sound often indicates a leak in a pressurized pipe, while a dripping or gurgling sound suggests a leak in a less pressurized part of the system. Feeling for leaks involves checking pipes and fittings for unusual dampness or coldness, indicating the presence of escaping water or a significant temperature drop due to the heat loss. Remember to always exercise caution when examining your heating system, particularly when dealing with hot surfaces or pressurized components.
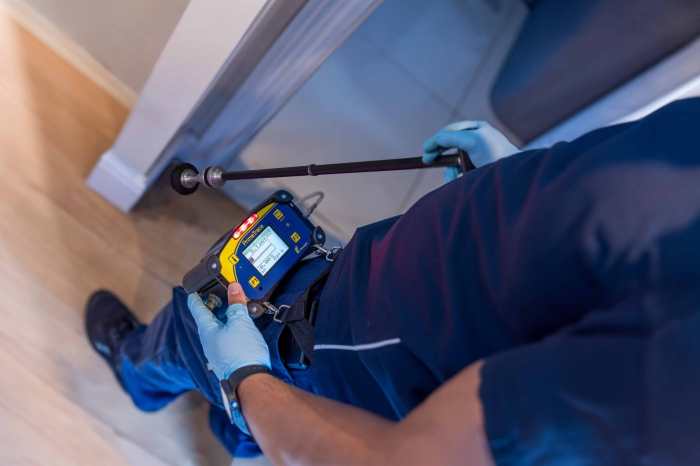
Using Listening Devices to Locate Leaks
A stethoscope, commonly used in medical applications, is an invaluable tool for pinpointing leaks in heating systems. Its ability to amplify faint sounds allows for the precise location of leaks that might otherwise be missed. Position the stethoscope’s earpiece against various sections of the pipes and fittings. Listen carefully for any unusual hissing, bubbling, or dripping sounds. The louder and clearer the sound, the closer the stethoscope is to the leak’s source. For larger heating systems, a more sensitive electronic leak detector might be necessary to overcome background noise. These devices typically use sensors to detect pressure fluctuations or ultrasonic sounds that are indicative of leaks. The precise location is indicated on a display or through an audible signal.
Decision-Making Flowchart for Auditory and Tactile Leak Detection
The following flowchart illustrates a systematic approach to using auditory and tactile methods for leak detection:
[Imagine a flowchart here. The flowchart would start with a “Start” box. The next box would be a decision point: “Is there a visible leak?”. If yes, the flow would go to a “Repair visible leak” box and then end. If no, the flow would go to a box that says “Listen for unusual sounds (hissing, dripping, gurgling)”. This box would branch to two boxes: “Unusual sounds detected?” and “No unusual sounds detected”. The “Unusual sounds detected?” box would branch to “Locate sound source with stethoscope/detector” and then to a “Repair leak” box and finally to an “End” box. The “No unusual sounds detected” box would branch to a box that says “Feel pipes and fittings for dampness or unusual coldness”. This would branch to “Dampness/coldness detected?” and “No dampness/coldness detected”. The “Dampness/coldness detected?” box would branch to a “Locate damp/cold area” box, then to a “Repair leak” box and finally to an “End” box. The “No dampness/coldness detected” box would go to an “Investigate other methods” box and then to an “End” box. The flowchart would visually depict the decision-making process involved in using both auditory and tactile methods.]
Last Recap
Successfully diagnosing a heating system leak requires a systematic approach combining visual inspection, pressure testing, and auditory/tactile methods. By employing the seven methods Artikeld above, you can effectively pinpoint the leak’s source, whether it’s a minor crack in a pipe or a more significant issue with your boiler. Remember, safety is paramount; if you’re unsure about any step, consult a qualified heating professional. Early detection and timely repair not only maintain your home’s comfort but also prevent costly damage in the long run.