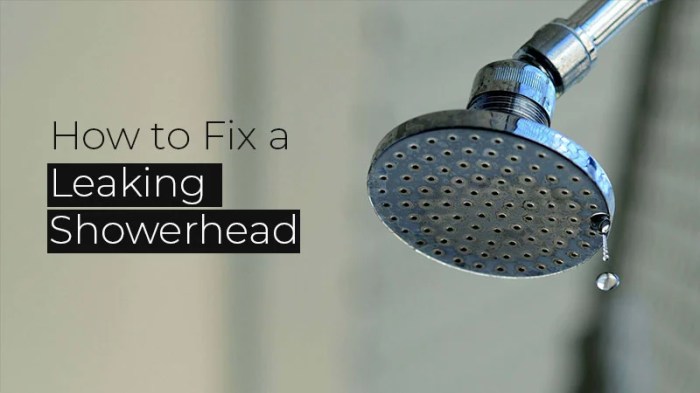
A persistent drip from your showerhead can be more than just annoying; it wastes water and can lead to higher utility bills. Understanding the source of the leak is the first step towards a quick and effective repair. This guide provides five practical methods to diagnose and fix a leaky showerhead, empowering you to tackle this common plumbing issue with confidence.
From identifying the precise location of the leak and gathering the necessary tools, to safely removing and replacing components, we’ll walk you through each stage of the process. Whether your showerhead is dripping, spraying erratically, or experiencing a constant flow, we’ll equip you with the knowledge and steps to restore its functionality and enjoy a satisfying shower once more.
Identifying the Leak Source

Pinpointing the source of a leaky showerhead is the first crucial step in resolving the issue. Understanding the different types of leaks and their common locations will help you diagnose the problem efficiently and choose the appropriate repair method. A thorough visual inspection is often sufficient to identify the source of the leak.
Common locations for showerhead leaks include the showerhead itself, the connection point between the showerhead and the arm, and the connection between the shower arm and the pipe in the wall. Leaks can manifest in various ways, each indicating a different potential problem.
Types of Showerhead Leaks
Showerhead leaks can range from a slow drip to a constant stream of water. A slow drip usually indicates a minor problem, such as a worn-out O-ring or a slightly loose connection. A steady spray, on the other hand, suggests a more significant issue, possibly a crack in the showerhead or a loose connection causing water to escape. A constant flow of water, even with the shower off, points to a more serious problem within the plumbing system itself, possibly requiring professional attention.
Visual Inspection of the Showerhead
Before disassembling anything, a careful visual inspection can often reveal the source of the leak. Begin by turning off the water supply to the shower. Then, carefully examine the showerhead for any visible cracks, damage, or signs of mineral buildup. Pay close attention to the spray nozzles; clogs or mineral deposits can cause inconsistent water flow and potentially lead to leaks. Check the entire surface of the showerhead for any signs of wear and tear, paying particular attention to the connection points and the overall integrity of the material. If the showerhead is made of plastic, check for cracks or warping. If it’s metal, look for corrosion or pitting.
Inspecting the Showerhead Connections
Next, examine the connections between the showerhead and the shower arm, and between the shower arm and the wall pipe. Look for any loose fittings, worn-out washers, or damaged threads. These areas are common leak points because of the constant vibration and pressure from the water flow. Pay attention to any signs of corrosion or calcium buildup around these joints. These deposits can impede a tight seal, resulting in leaks. Gently wiggle the showerhead and arm to check for looseness. A loose connection is often a primary cause of leaks.
Comparison of Leak Sources and Symptoms
| Leak Source | Typical Symptoms | Likely Cause | Solution |
|---|---|---|---|
| Showerhead itself (spray nozzles) | Dripping or spraying from specific nozzles | Clogged or damaged nozzles, mineral buildup | Clean nozzles, replace showerhead |
| Connection between showerhead and arm | Dripping or spraying from the connection | Loose connection, worn O-ring, damaged threads | Tighten connection, replace O-ring, replace showerhead/arm |
| Connection between shower arm and pipe | Dripping or constant flow even when off | Loose connection, worn washer, damaged pipe | Tighten connection, replace washer, potentially requires professional plumbing repair |
| Shower valve | Constant dripping or flow, even when shower is off | Faulty valve cartridge, worn seals | Replace cartridge or valve (usually requires professional help) |
Tools and Materials Needed for Repair

Successfully repairing a leaky showerhead requires the right tools and materials. Having everything prepared beforehand will streamline the process and prevent unnecessary delays. This section details the essential items you’ll need to tackle the job efficiently and effectively.
Gathering the necessary tools and replacement parts before starting any repair is crucial for a smooth and efficient process. Improper tools can lead to damage, while incorrect parts can render the repair ineffective. The following sections will guide you through selecting the appropriate items for your specific showerhead.
Essential Tools for Showerhead Repair
The tools needed for showerhead repair are generally simple and readily available at most hardware stores. Having the correct tools will significantly improve the ease and safety of the repair.
- Adjustable wrench: This allows for a secure grip on various sized showerhead connections.
- Pliers (needle-nose and slip-joint): Useful for accessing tight spaces and gripping small parts.
- Plumber’s tape (Teflon tape): This creates a watertight seal on threaded connections, preventing leaks.
- Screwdriver (Phillips and flathead): Some showerheads require screws for removal or disassembly.
- Bucket or container: To catch any remaining water in the shower arm.
- Towels: For cleaning up any spills or drips.
Replacement Parts for Showerhead Repair
The specific replacement parts you need will depend on the type of showerhead and the source of the leak. It is advisable to inspect the showerhead carefully to identify the damaged component before purchasing replacements.
- O-rings: These small rubber rings create watertight seals within the showerhead mechanism. They are prone to wear and tear, often the cause of leaks.
- Washers: Similar to O-rings, washers provide sealing and are often found in the showerhead’s internal components.
- Cartridges: These are internal components containing the flow control and temperature regulation mechanisms. A faulty cartridge can cause significant leaks or affect water flow.
- Showerhead itself: In cases of severe damage or mineral buildup, replacing the entire showerhead might be necessary.
Choosing the Right Replacement Parts
Selecting the correct replacement parts is paramount for a successful repair. The type of showerhead significantly influences the required parts. Before purchasing, carefully examine your showerhead’s make and model for compatibility information.
If you are unsure about the specific parts needed, taking a photograph of the damaged components or the showerhead’s model number to your local hardware store will allow for precise matching.
Checklist for Gathering Necessary Materials
A simple checklist ensures you have everything before beginning the repair. This prevents interruptions and ensures a smooth workflow.
- Adjustable wrench
- Pliers (needle-nose and slip-joint)
- Plumber’s tape
- Screwdriver (Phillips and flathead)
- Bucket or container
- Towels
- Replacement O-rings (if needed)
- Replacement washers (if needed)
- Replacement cartridge (if needed)
- Replacement showerhead (if needed)
Preparing the Workspace and Tools
Proper workspace preparation is essential for a safe and efficient repair. This involves organizing your tools and creating a clean working environment.
- Turn off the water supply to the shower. This is crucial to prevent water damage and injury.
- Gather all necessary tools and replacement parts. Refer to the checklist above.
- Clear the area around the showerhead, removing any obstacles that may hinder your work.
- Lay down towels or a drop cloth to protect the surrounding surfaces from water or debris.
- Have a bucket ready to catch any remaining water in the shower arm.
Repairing the Leaky Showerhead

Repairing a leaky showerhead often involves simple fixes, saving you the cost and hassle of a full replacement. Successfully completing this task requires careful attention to detail and the right tools. This section will guide you through the process of removing, inspecting, cleaning, and reinstalling your showerhead to resolve the leak.
Removing the Old Showerhead
Before beginning any repairs, turn off the water supply to the shower. This is crucial to prevent water damage and ensure your safety. Use an adjustable wrench to carefully loosen the showerhead from the shower arm. Some showerheads may have a decorative nut that needs to be removed first before accessing the main connection. Turn the wrench counter-clockwise to loosen the connection. If the connection is particularly stubborn, you may need to apply some penetrating oil to help loosen it. Once loosened, carefully unscrew the showerhead by hand.
Inspecting and Replacing Worn Parts
Once the showerhead is removed, carefully inspect all components, including the O-rings and washers. These small rubber parts are responsible for creating a watertight seal. If they are cracked, brittle, or deformed, they need to be replaced. The O-rings and washers are usually readily available at most hardware stores. Match the size and type of the old parts to ensure a proper fit. Use a small screwdriver or similar tool to carefully remove the old O-rings and washers. Gently lubricate the new O-rings and washers with a silicone-based lubricant before installation. This will help create a better seal and prevent future leaks.
Cleaning the Showerhead and Components
Mineral deposits and limescale can build up inside the showerhead, restricting water flow and potentially causing leaks. Soak the showerhead and its components in a solution of white vinegar and water for about 30 minutes to an hour. This will help dissolve the mineral deposits. After soaking, use a small brush or toothbrush to scrub away any remaining deposits. Rinse all components thoroughly with clean water. Pay close attention to the small holes in the showerhead, ensuring they are clear and unobstructed.
Installing the New or Repaired Showerhead
Apply a thin layer of plumber’s grease or silicone-based lubricant to the threads of the shower arm and the showerhead connection. This will help create a watertight seal and make installation easier. Carefully screw the showerhead onto the shower arm, turning it clockwise until it is snug. Do not overtighten, as this can damage the showerhead or the shower arm. Use an adjustable wrench to tighten the connection slightly if necessary, but avoid excessive force. Once the showerhead is installed, turn the water supply back on and check for any leaks.
Tightening Connections to Prevent Future Leaks
Properly tightening connections is essential to prevent future leaks. Overtightening can damage the components, while under-tightening can lead to leaks. Use a wrench to tighten the connections securely, but avoid excessive force. A snug fit is all that’s required. If you encounter any leaks after installation, double-check all connections and ensure that all O-rings and washers are properly seated. If the leak persists, you may need to repeat the inspection and replacement process.
Replacing the Showerhead Cartridge
| Step | Description |
|---|---|
| 1. Turn off the water supply. | This is crucial for safety and preventing water damage. |
| 2. Remove the showerhead. | Unscrew the showerhead from the shower arm using an adjustable wrench. |
| 3. Locate the cartridge. | The cartridge is usually located within the showerhead body. |
| 4. Remove the old cartridge. | Use a suitable tool (often a screwdriver or small wrench) to carefully remove the old cartridge. |
| 5. Clean the cartridge housing. | Remove any debris or mineral deposits from the housing. |
| 6. Install the new cartridge. | Gently insert the new cartridge into the housing, ensuring it is properly seated. |
| 7. Reassemble the showerhead. | Carefully reassemble the showerhead, ensuring all parts are properly secured. |
| 8. Reinstall the showerhead. | Reconnect the showerhead to the shower arm, tightening securely but not excessively. |
| 9. Turn the water supply back on. | Check for leaks. |
Ending Remarks

Addressing a leaky showerhead effectively involves a systematic approach: accurate diagnosis, proper tool selection, careful part replacement, and meticulous reassembly. By following the steps Artikeld, you can confidently tackle this common plumbing problem, saving money on potential water waste and enjoying the satisfaction of a DIY repair. Remember to always prioritize safety and consult a professional if you encounter any difficulties.