A dripping faucet is more than just an annoyance; it’s a silent drain on your water bill and a potential source of water damage. Understanding the mechanics of your faucet and employing a systematic approach to troubleshooting can save you money and prevent costly repairs. This guide provides five practical ways to diagnose and resolve the common problem of a leaky faucet handle, empowering you to tackle this household issue with confidence.
From identifying the source of the leak—whether it’s a worn-out O-ring, a faulty cartridge, or a loose connection—to addressing external issues like loose screws or cracks, we’ll walk you through each step of the repair process. We’ll cover both simple fixes that require minimal tools and more involved repairs that may necessitate replacing parts. By the end, you’ll be equipped to tackle most leaky faucet handle situations effectively.
Identifying the Source of the Leak

Pinpointing the exact source of a leaky faucet handle is crucial for effective repair. Understanding the different types of leaks and their causes allows for a targeted approach, saving time and preventing unnecessary part replacements. A systematic inspection, using readily available tools, will help you quickly identify the problem area.
Types of Leaky Faucet Handles and Their Causes
Several factors contribute to leaky faucet handles. The most common culprits include worn-out O-rings, damaged cartridges, loose packing nuts, or corroded internal components. Drip leaks often stem from worn O-rings or seals, while a steady stream might indicate a problem with the cartridge or valve seat. Leaks at the base of the handle could signify a loose packing nut or a crack in the faucet body.
Visual Inspection of the Faucet Handle
Before disassembling anything, carefully examine the faucet handle for any obvious signs of wear and tear. Look for cracks or chips in the handle itself, loose screws holding the handle in place, or any signs of corrosion around the base. Check for any visible damage to the spout or the area where the handle connects to the faucet body. A magnifying glass can be helpful for identifying minute cracks or damage. Note the location and nature of any visible damage.
Isolating the Leak Source Using Basic Tools
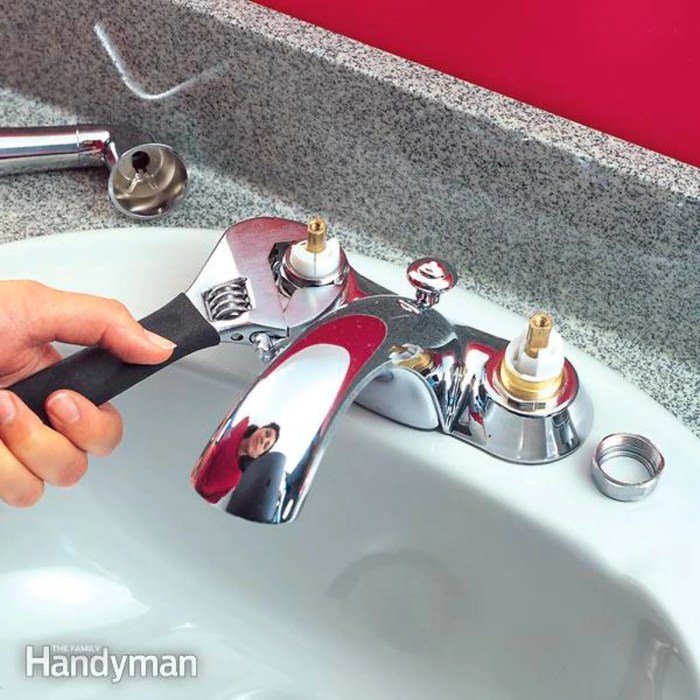
To pinpoint the leak’s origin, you’ll need basic tools: a screwdriver (likely Phillips and flathead), pliers, and potentially adjustable wrenches. Begin by turning off the water supply to the faucet. Then, carefully remove the faucet handle, following the manufacturer’s instructions if available. Once the handle is removed, closely inspect the internal components for wear, damage, or loose parts. Pay close attention to the O-rings, seals, and the cartridge (if applicable). If the leak persists after replacing the O-rings, the cartridge itself may need replacement. Observe carefully where water is seeping from to guide your repair.
Checking for Leaks Around the Faucet Base and Spout
After examining the handle, check the faucet base and spout for leaks. A leak at the base often indicates a problem with the faucet’s connection to the sink or a loose nut securing the faucet body. A leak at the spout may indicate a worn-out O-ring or seal within the spout assembly. Tightening loose nuts or replacing worn seals can resolve these issues. If you detect a leak at the base, check for any cracks or damage in the faucet body. Consider using plumber’s putty to ensure a proper seal around the base.
Comparison of Leak Symptoms and Causes
| Symptom | Likely Cause | Severity | Solution |
|---|---|---|---|
| Slow, steady drip | Worn O-ring or washer | Low | Replace O-ring or washer |
| Continuous stream | Faulty cartridge or valve | Medium | Replace cartridge or valve |
| Leak at the base of the faucet | Loose connection or cracked faucet body | Medium to High | Tighten connections or replace faucet |
| Leak from the spout | Worn O-ring or seal in the spout | Low to Medium | Replace O-ring or seal |
Repairing Internal Components

Once you’ve identified the source of the leak, you’ll need to access and repair the internal components of your faucet handle. This often involves disassembling the handle, identifying the faulty part, and replacing or repairing it. Remember to take clear photographs at each step of disassembly to aid in reassembly. This will be particularly helpful if you encounter any unexpected challenges.
Disassembling the faucet handle requires care and patience. Generally, you will need a small screwdriver (often a Phillips head) and possibly pliers. Before beginning, turn off the water supply to the faucet. The internal components vary depending on the faucet type, but common parts include O-rings, washers, and cartridges.
Faucet Handle Internal Components and Their Functions
The internal workings of a faucet handle are relatively straightforward. O-rings are small, rubber rings that create a watertight seal around moving parts. Washers, typically made of rubber or plastic, provide a similar sealing function, often working in conjunction with O-rings. Cartridges are more complex components that contain several internal parts and often control both the hot and cold water flow. A worn or damaged O-ring, washer, or cartridge will lead to leaks.
Replacing Worn Components
Replacing worn O-rings, washers, or cartridges is a relatively simple process. Begin by carefully removing the handle using the appropriate screwdriver. Take photos at each step. Once the handle is removed, you’ll have access to the internal components. Inspect each part for wear and tear. O-rings should be supple and free of cracks; washers should be flat and undamaged; cartridges should move freely and show no signs of corrosion or damage.
To replace a worn O-ring or washer, simply remove the old one and carefully install the new one, ensuring it sits correctly in its groove. For cartridges, the process is slightly more involved and requires following the manufacturer’s instructions, which are often included with replacement cartridges. Always use replacement parts that are specifically designed for your faucet model.
Replacing a Cartridge
Replacing a cartridge involves several steps:
- Turn off the water supply to the faucet.
- Carefully remove the faucet handle, taking photos at each step.
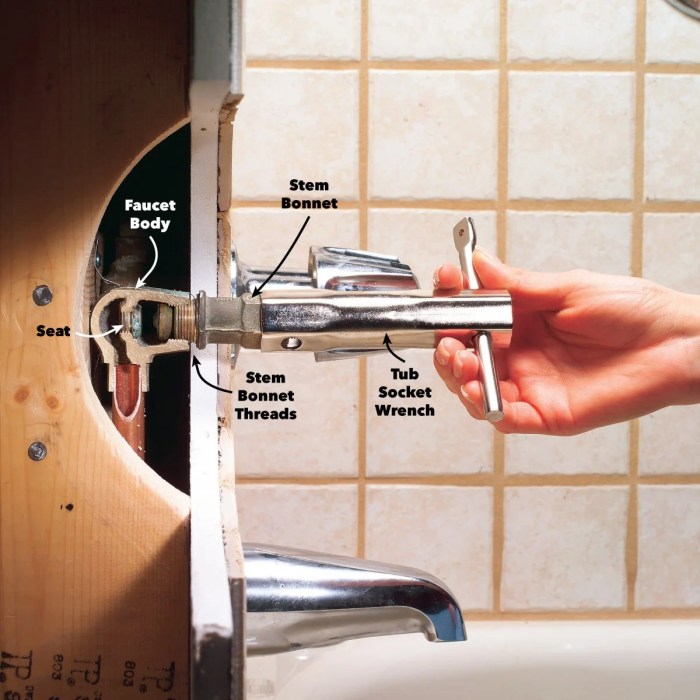
- Locate the cartridge and remove it. This may involve unscrewing it or using a special tool, depending on the faucet design.
- Compare the old cartridge to the new one to ensure they are identical.
- Install the new cartridge, ensuring it is seated correctly.
- Reassemble the faucet handle, following the photos taken during disassembly.
- Turn the water supply back on and check for leaks.
Lubricating and Reassembling the Handle
After replacing any worn components, apply a small amount of plumber’s grease to the moving parts. This will help to ensure smooth operation and prevent future wear. Carefully reassemble the handle, following the steps documented in your photographs. Tighten all screws securely, but avoid over-tightening, which could damage the components. Once reassembled, turn the water supply back on and check for any remaining leaks.
Addressing External Issues

Addressing external issues related to a leaky faucet handle often involves simple fixes that can prevent more extensive repairs. These issues typically manifest outside the internal workings of the faucet itself, focusing instead on the handle’s connection to the faucet body and the overall seal around the faucet base. Properly addressing these external factors can quickly resolve many common leaks.
Tightening Loose Screws or Nuts
Loose screws or nuts connecting the faucet handle to the faucet body are a frequent cause of leaks. Over time, vibrations and general use can loosen these fasteners, creating gaps that allow water to escape. To remedy this, locate the screws or nuts securing the handle. Use the appropriate size screwdriver or wrench to tighten them firmly, but avoid over-tightening, which could strip the screws or damage the faucet. A firm grip should be sufficient to eliminate the leak. If the screws or nuts are stripped, replacement may be necessary.
Repairing or Replacing a Damaged Faucet Handle
A damaged faucet handle, such as one with cracks or a broken surface, can also lead to leaks. Minor surface damage might be repairable with epoxy or a similar adhesive. However, significant damage necessitates handle replacement. Before attempting repairs, carefully examine the handle for the extent of the damage. If the damage compromises the handle’s structural integrity or its ability to form a proper seal, replacement is the recommended course of action. Replacing a damaged handle involves removing the old handle, following the manufacturer’s instructions, and installing the new one.
Sealing Gaps or Cracks Around the Faucet Base
Leaks can also originate from gaps or cracks around the faucet base where the faucet meets the sink. These openings allow water to seep underneath the sink. To address this, carefully clean the area around the faucet base to remove any debris or old sealant. Apply a suitable sealant, such as silicone caulk, to fill any gaps or cracks. Ensure the sealant is properly smoothed to create a watertight seal. Allow the sealant to cure completely according to the manufacturer’s instructions before testing the faucet.
Replacing the Faucet Handle
If other repairs fail to resolve the leak, replacing the entire faucet handle might be the most effective solution. This often involves removing the old handle, potentially including internal components, and installing a new one. The process varies depending on the faucet’s design, so referring to the manufacturer’s instructions is crucial. This often involves removing screws, nuts, or other fasteners securing the handle, carefully extracting the old handle, and installing the new one following the reverse procedure. Ensure a proper seal is maintained during the installation.
Decision-Making Flowchart for Repair or Replacement
The following flowchart Artikels the decision-making process:
[Imagine a flowchart here. The flowchart would start with a diamond shape: “Is the leak due to a loose handle?” A “yes” branch would lead to a rectangle: “Tighten screws/nuts”. A “no” branch would lead to another diamond: “Is the handle damaged?” A “yes” branch would lead to a rectangle: “Repair or replace handle”. A “no” branch would lead to a diamond: “Is there a gap/crack around the base?” A “yes” branch would lead to a rectangle: “Apply sealant”. A “no” branch would lead to a rectangle: “Replace the entire faucet handle”. All rectangles would have arrows leading to a final rectangle: “Test for leaks”.]
Epilogue

Addressing a leaky faucet handle effectively involves a combination of careful diagnosis and targeted repair. By systematically examining the faucet for external issues and then investigating internal components if necessary, you can often resolve the problem without needing to call a plumber. Remember, taking photos as you disassemble the faucet is crucial for reassembly. With patience and the right tools, you can conquer this common household challenge and enjoy the peace of mind that comes with a properly functioning faucet.