A sputtering engine, misfires, or complete failure to start can all point to a failing ignition coil. This critical component delivers the high-voltage spark needed to ignite the air-fuel mixture in your engine’s cylinders. Diagnosing a faulty coil doesn’t require extensive mechanical expertise; several straightforward tests can pinpoint the problem, saving you time and money on unnecessary repairs. This guide Artikels four effective diagnostic methods, empowering you to identify and address this common automotive issue with confidence.
From simple visual inspections to advanced diagnostic tools, we’ll cover a range of techniques suitable for various skill levels. Understanding these tests will allow you to effectively troubleshoot ignition problems, ensuring your vehicle runs smoothly and reliably. We’ll explore practical steps, interpret results, and provide helpful tips to guide you through the process. Let’s delve into the details and equip you with the knowledge to tackle ignition coil issues head-on.
Visual Inspection and Basic Checks
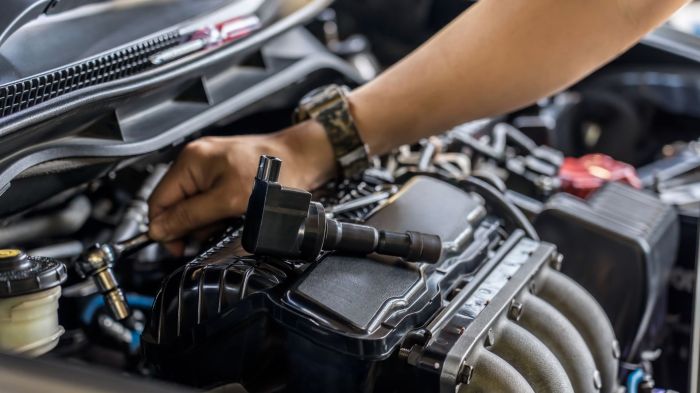
A visual inspection and some basic checks can often quickly identify a faulty ignition coil. Before resorting to more complex diagnostic procedures, a thorough visual examination and simple tests can save time and effort. These initial steps can help pinpoint the problem area and guide further troubleshooting.
A faulty ignition coil may exhibit several visual signs of damage. These are often caused by overheating, electrical arcing, or exposure to moisture and contaminants. Careful observation can reveal these defects.
Ignition Coil Appearance: Good vs. Bad
Comparing the physical appearance of a known good ignition coil with the suspected faulty one can provide valuable clues. The following table highlights key differences.
| Feature | Good Coil | Bad Coil | Image Description |
|---|---|---|---|
| Exterior Condition | Clean, no cracks or discoloration. Uniform color. | Cracks, burns, discoloration (often dark brown or black), signs of melting or warping. Possible corrosion on terminals. | A good coil would appear new or nearly new, with smooth surfaces and consistent coloring. A bad coil might show charring, bubbling, or a cracked ceramic insulator. |
| Connections | Secure, clean, and corrosion-free terminals and wire connections. | Loose, corroded, or broken wires; damaged terminals; evidence of arcing or burning around the connections. | The image would show clean, tight connections on a good coil, whereas a bad coil would have loose wires, green corrosion, or signs of past electrical discharge. |
| Insulator | Intact, smooth, and free from cracks or damage. | Cracked, chipped, or broken insulator. This is a critical area as it provides electrical insulation. | A good coil’s insulator would be smooth and without any visible imperfections. A damaged coil would show cracks or chips in the ceramic or plastic casing. |
| Overall Condition | Solid, no signs of physical damage or wear. | Loose internal components (rare but possible), signs of excessive heat exposure, such as warping or deformation. | A healthy coil appears robust and undamaged, while a damaged one might be misshapen or show signs of significant heat damage. |
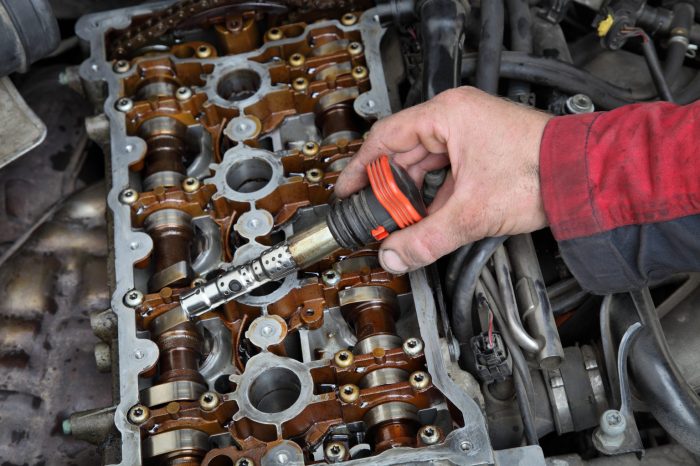
Checking Ignition Coil Connections
Loose, corroded, or broken connections can prevent the ignition coil from functioning correctly. A simple visual inspection and a careful check of the connections are crucial steps in diagnosing the problem.
- Disconnect the negative battery terminal before beginning any work on the ignition system.
- Visually inspect all wiring connected to the ignition coil for any signs of damage, such as fraying, breaks, or corrosion.
- Carefully check the coil’s terminals for any signs of corrosion or looseness. Clean any corrosion using a wire brush or appropriate contact cleaner.
- Tighten any loose connections, ensuring a secure fit. Use appropriate-sized sockets or wrenches to avoid damaging the terminals.
- Reconnect the negative battery terminal after completing the inspection and repairs.
Measuring Ignition Coil Resistance
Using a multimeter to measure the primary and secondary resistance of the ignition coil provides a quantitative assessment of its condition. Specific resistance values will vary depending on the coil’s design and specifications, but significant deviations from the manufacturer’s specifications usually indicate a faulty coil.
For accurate measurements, consult your vehicle’s repair manual for the expected resistance values. Typical ranges are provided below, but always refer to the manufacturer’s specifications.
| Coil Type | Primary Resistance (Ohms) | Secondary Resistance (Ohms) |
|---|---|---|
| Typical Automotive Coil | 0.5 – 2.0 | 5,000 – 20,000 |
| High-Performance Coil | 0.3 – 1.5 | 8,000 – 30,000 |
| Motorcycle Coil | 0.8 – 3.0 | 6,000 – 25,000 |
Note: These are typical ranges and may vary significantly. Always consult your vehicle’s service manual for precise specifications.
Spark Testing Methods
Diagnosing a faulty ignition coil often involves directly assessing its ability to generate a high-voltage spark. Spark testing is a crucial step in this process, allowing for a definitive determination of coil functionality. This section details the procedures and interpretations involved in effective spark testing.
Spark testing verifies the ignition coil’s capacity to produce the necessary high-voltage spark to ignite the air-fuel mixture in the engine’s cylinders. A successful spark test confirms the coil’s ability to deliver sufficient energy, while a failure points towards a malfunctioning coil or related components.
Spark Tester Tool Procedure
Performing a spark test using a dedicated spark tester involves a straightforward procedure. First, disconnect the spark plug wire from the spark plug. Then, carefully connect one end of the spark tester to the spark plug wire and ground the other end to a clean, unpainted metal surface on the engine block. Ensure a secure connection to avoid arcing issues. Next, crank the engine over using the starter motor. Observe the spark generated between the spark tester’s electrodes.
Image Description: Close-up of spark tester connected to spark plug wire, showing a strong, blue spark. The spark tester is a small handheld device with two terminals; one is clipped onto the spark plug wire, and the other is securely grounded to the engine block. The spark is bright blue, indicating a healthy ignition system.
Image Description: Close-up of spark tester connected to spark plug wire, showing a weak, orange spark. The spark is faint, intermittent, and orange in color, indicating a problem with the ignition coil or other related components.
Image Description: Close-up of spark tester connected to spark plug wire, showing no spark. The tester is properly connected, but no spark is visible, strongly suggesting a fault in the ignition coil or a complete break in the circuit.
Spark Test Result Interpretation
A healthy ignition coil will produce a strong, consistent, blue spark. The spark should be bright and easily visible in normal ambient light. A weak or orange spark suggests a problem; this could be due to a failing ignition coil, low battery voltage, or a problem with the ignition control module. An absent spark almost certainly indicates a fault within the ignition system, likely the coil itself, though other components could be at fault.
Comparison of Spark Testing Methods
While a dedicated spark tester offers convenience and precision, a simpler method involves using only the spark plug wire. In this method, the spark plug is removed and the wire is carefully held about ⅛ inch from a grounded metal surface. The engine is then cranked. However, this method is less safe and less precise, as the spark might be unpredictable and the distance between the wire and the ground needs to be carefully controlled to avoid injury.
A dedicated spark tester offers better control and safety. It provides a consistent gap for spark observation, reducing the risk of shock and providing a clearer indication of spark strength. Using only the spark plug wire involves a higher risk of electrical shock and can make spark assessment less accurate due to inconsistent spark gap.
Advanced Diagnostic Techniques

Moving beyond visual inspection and basic spark testing, advanced diagnostic techniques offer a more precise method for pinpointing a faulty ignition coil. These techniques leverage the diagnostic capabilities built into modern vehicles and provide a more systematic approach to troubleshooting.
Using a scan tool to retrieve diagnostic trouble codes (DTCs) allows for a direct assessment of the vehicle’s electronic systems. These codes are generated by the onboard computer (ECU) when it detects a malfunction. Analyzing these codes can quickly identify potential problems within the ignition system, saving time and effort compared to trial-and-error methods.
Retrieving and Interpreting Diagnostic Trouble Codes (DTCs)
A scan tool, connected to the vehicle’s onboard diagnostics (OBD) port, retrieves DTCs stored in the ECU’s memory. These codes are typically alphanumeric, such as P0351, which might indicate a malfunction in the ignition coil circuit for cylinder 1. Different codes correspond to different faults. For instance, a code indicating a misfire on a specific cylinder strongly suggests a problem with the corresponding ignition coil. A mechanic or experienced DIYer should consult a DTC lookup table specific to the vehicle’s make and model to accurately interpret the code’s meaning. The codes themselves often point directly to a faulty coil, but further investigation might be necessary for confirmation.
Troubleshooting Flowchart for Faulty Ignition Coil Diagnosis
The following flowchart Artikels a systematic approach to diagnosing a faulty ignition coil using a combination of visual inspection, spark testing, and scan tool data:
[Imagine a flowchart here. The flowchart would begin with “Engine Misfire?”. A “Yes” branch would lead to “Visual Inspection of Ignition Coils (Cracks, Damage)?”. A “Yes” branch would lead to “Replace Ignition Coil”. A “No” branch would lead to “Spark Test?”. A “Yes” branch would lead to “Weak or No Spark on Specific Cylinder?”. A “Yes” branch would lead to “Replace Ignition Coil”. A “No” branch would lead to “Scan Tool Diagnosis?”. A “Yes” branch would lead to “Review DTCs (Misfire Codes)?”. A “Yes” branch would lead to “Cylinder Contribution Test”. A “No” branch would lead to “Further Investigation Needed”. A “No” branch from “Engine Misfire?” would lead to “Check Other Potential Causes (Fuel System, Sensors, etc.)”. The “Cylinder Contribution Test” branch would lead to “Identify Faulty Cylinder Based on Performance Variation”. A “Yes” branch would lead to “Replace Ignition Coil”. A “No” branch would lead to “Further Investigation Needed”.]
Cylinder Contribution Test
A cylinder contribution test assesses the contribution of each cylinder to the engine’s overall power output. This is achieved by selectively disabling each cylinder, one at a time, and observing the change in engine performance. A significant drop in engine performance when a particular cylinder is disabled points to a problem with that cylinder, often indicating a faulty ignition coil. The test can be performed using specialized scan tools capable of fuel cut-off or by utilizing a method involving disconnecting the spark plug wire of each cylinder one at a time (while the engine is running, with appropriate safety precautions) and observing the engine’s RPM drop. A larger than expected RPM drop for a particular cylinder would suggest a problem with that cylinder’s ignition coil. For example, if disabling cylinder 3 results in a significantly greater RPM drop compared to disabling other cylinders, it strongly suggests a fault with cylinder 3’s ignition coil. This method helps isolate the faulty coil without relying solely on DTCs.
Final Wrap-Up

Successfully diagnosing a faulty ignition coil is achievable with the right approach and tools. By systematically employing visual inspection, spark testing, and advanced diagnostic techniques, you can effectively identify the source of ignition problems. This proactive approach prevents more extensive engine damage and saves you potential repair costs. Remember, safety is paramount; always disconnect the battery before working on your vehicle’s electrical system. With the knowledge gained from this guide, you are now better equipped to maintain the health and performance of your vehicle’s ignition system.