A malfunctioning ice maker can be a frustrating kitchen inconvenience. From a sudden halt in ice production to the creation of oddly shaped or sized ice cubes, the problem can range from minor annoyances to significant disruptions. Understanding the common causes and employing a systematic troubleshooting approach can save you time, money, and the aggravation of a perpetually empty ice bin. This guide provides six crucial steps to diagnose and resolve common ice maker issues, helping you restore your kitchen’s frosty efficiency.
By following these straightforward steps, you’ll systematically investigate potential problems, from simple fixes like checking the water supply to more involved solutions such as inspecting internal components. This methodical approach minimizes unnecessary repairs and empowers you to tackle the issue effectively, often avoiding costly service calls.
Identifying the Problem

Before diving into repairs, understanding the root cause of your ice maker’s malfunction is crucial. A systematic approach, starting with a visual inspection, can often pinpoint the issue quickly and efficiently, saving you time and potential frustration. Common causes range from simple blockages to more complex mechanical or electrical problems.
A malfunctioning ice maker can manifest in several ways, from no ice production at all to the production of small, oddly shaped ice cubes, or slow ice production. Identifying these symptoms is the first step towards effective troubleshooting.
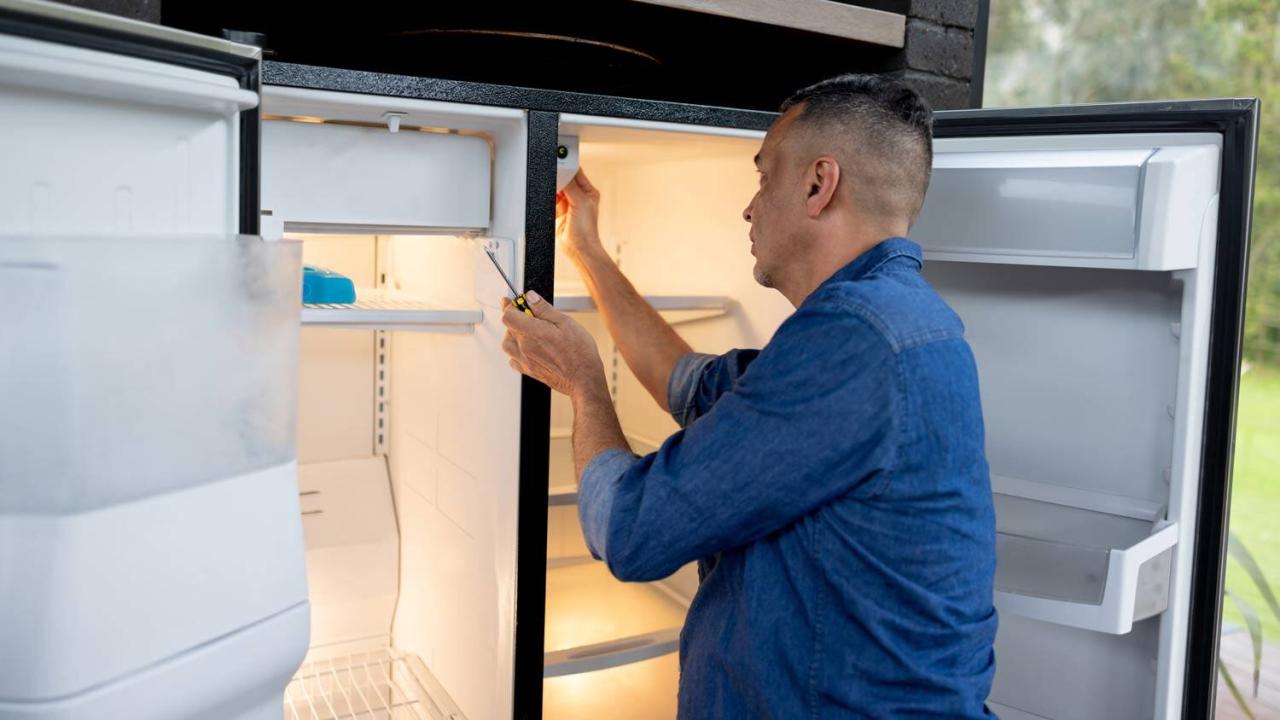
Visual Inspection of the Ice Maker
Begin by carefully examining the ice maker itself. Look for any obvious signs of trouble. First, check the water supply line leading to the ice maker. Is it kinked, cracked, or leaking? A damaged line will prevent water from reaching the ice maker, halting ice production. Next, inspect the ice bin. Is it full? A full ice bin can prevent the ice maker from functioning properly. Check for any ice or frost build-up that might be obstructing the ice maker’s mechanism. Finally, look for any visible damage to the ice maker itself, such as loose wires or broken parts.
Checking the Water Supply Line
The water supply line is a common culprit in ice maker malfunctions. Carefully trace the line from the water source to the ice maker. Look for any kinks, which restrict water flow. Check for leaks, indicating a potential rupture in the line. Feel the line; it should be pliable and free of blockages. If you find a kink, gently try to straighten it. If there’s a leak, you’ll need to replace the damaged section of the line. If the line appears clear but there is still no water, check the water valve connected to the ice maker.
Ice Maker Malfunction Symptoms and Potential Causes
The following table summarizes common ice maker problems and their potential causes:
| Symptom | Potential Cause 1 | Potential Cause 2 | Potential Cause 3 |
|---|---|---|---|
| No Ice Production | Water supply line blockage | Faulty water inlet valve | Malfunctioning ice maker motor |
| Small Ice Cubes | Insufficient water supply | Frozen water line | Ice maker not properly leveled |
| Slow Ice Production | Low water pressure | Dirty water filter | Ice maker not properly ventilated |
| Ice Cubes Stuck in the Ice Maker | Ice buildup in the ice maker | Malfunctioning ice ejector mechanism | Ice bin not properly positioned |
Checking Electrical and Water Connections
A malfunctioning ice maker often stems from issues with its power supply or water source. Before delving into more complex repairs, verifying these basic connections is crucial for efficient troubleshooting. Addressing these points first can save significant time and effort.
Proper electrical and water connections are fundamental to the ice maker’s operation. A lack of power or a disrupted water supply will immediately prevent ice production. This section details how to check both aspects systematically.
Ice Maker Power Supply
Confirming the ice maker receives sufficient power involves a straightforward process. First, visually inspect the power cord to ensure it’s securely plugged into both the ice maker and the wall outlet. Look for any visible damage to the cord, such as fraying or kinks. If the cord appears damaged, replace it immediately. Next, check the outlet itself by plugging in another appliance to confirm it’s functioning correctly. If the other appliance works, the problem likely lies with the ice maker itself; if not, the issue is with the power outlet. Finally, check the ice maker’s internal circuit breaker, often located near the power cord, to ensure it hasn’t tripped.
Water Inlet Valve Operation
The water inlet valve controls the flow of water into the ice maker. To test its functionality, locate the valve—usually a small solenoid valve connected to the water supply line. You may need to consult your ice maker’s manual for its precise location. Turn off the water supply to the ice maker. Disconnect the water line from the valve. Turn the water supply back on and observe if water flows freely from the disconnected line. If water flows, the valve is likely the problem. If not, the problem could be with the water supply itself or a blockage further upstream. Reattach the water line once you have determined the state of the valve.
Water Filter Inspection
Many ice makers incorporate a water filter to improve the quality of the ice. A clogged filter can significantly restrict water flow, hindering ice production. Locate the filter, usually found on the water supply line near the ice maker. Consult your owner’s manual for its exact location and replacement instructions. If your ice maker has a filter, check its condition. If it appears dirty or clogged, replace it with a new filter according to the manufacturer’s instructions. A new filter often resolves water flow issues.
Troubleshooting Flowchart for Electrical and Water Connections
The following flowchart visually summarizes the troubleshooting steps for electrical and water connection problems:
[Imagine a flowchart here. The flowchart would start with a box labeled “Ice Maker Not Making Ice?”. This would branch to two boxes: “Check Electrical Connection” and “Check Water Connection”. The “Check Electrical Connection” box would branch to “Is Power Cord Plugged In?” (Yes/No), “Is Outlet Working?” (Yes/No), and “Is Circuit Breaker Tripped?” (Yes/No). The “Check Water Connection” box would branch to “Is Water Supply Turned On?” (Yes/No), “Is Water Line Connected?” (Yes/No), and “Is Water Filter Clogged?” (Yes/No). Each “No” answer would lead to a “Repair/Replace” box, while each “Yes” answer would lead back to the main question, indicating that the problem should be investigated further.]
Addressing Internal Components and Mechanisms
Ice maker malfunctions often stem from issues within the unit itself. Understanding the internal components and how to inspect them is crucial for effective troubleshooting. This section will guide you through the process of examining the ice mold, auger, and other key internal parts.
The most common internal components that can cause ice maker problems are the ice mold (where the ice is formed), the ice auger (which harvests the ice), and the ice dispenser (which releases the ice). Problems with any of these can lead to no ice production, small ice cubes, or a jammed ice dispenser.
Ice Mold Cleaning and Ice Buildup Removal
Regular cleaning of the ice mold is essential for optimal ice maker performance. Ice buildup can restrict water flow and prevent proper ice formation. To clean the ice mold, first disconnect the ice maker from the power supply. Then, carefully remove any loose ice chunks. A soft brush or sponge can be used to gently scrub away any remaining ice or debris. Avoid using harsh chemicals or abrasive cleaners, as these could damage the ice mold. Thoroughly rinse the mold with clean water and allow it to dry completely before reconnecting the power. If persistent ice buildup is present, consider using a solution of warm water and white vinegar to help loosen it. Always ensure the ice mold is completely dry before resuming operation to prevent further issues.
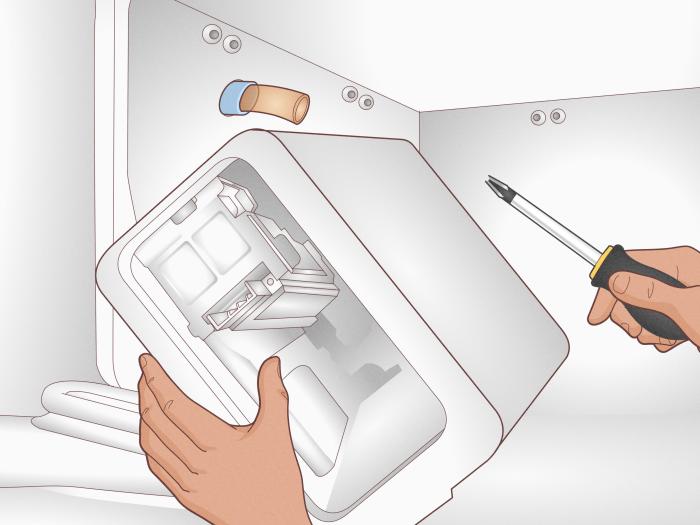
Ice Auger Inspection and Obstruction Removal
The ice auger is a rotating mechanism that pushes the frozen ice cubes out of the mold. Obstructions or damage to the auger are frequent causes of ice maker failure. To check the auger, access it by carefully removing the ice maker’s front panel (refer to your appliance’s manual for specific instructions). Visually inspect the auger for any blockages, such as pieces of ice, debris, or mineral deposits. If you find any obstructions, carefully remove them using tweezers or a small, non-metallic tool. Inspect the auger for damage; bent or broken parts should be replaced. Once the auger is clear and undamaged, carefully reassemble the ice maker.
Inspecting and Cleaning Internal Components
A thorough inspection and cleaning of all internal components can significantly improve the ice maker’s functionality. This preventative maintenance is highly recommended.
- Disconnect the ice maker from the power supply.
- Remove any loose ice or debris from the ice mold and surrounding areas.
- Inspect the ice auger for obstructions or damage. Clean or replace as needed.
- Check the water inlet valve for any blockages or leaks. Clean or replace if necessary.
- Inspect the water lines for kinks or damage. Repair or replace if needed.
- Clean the ice maker’s interior with a soft brush and warm water, ensuring all components are thoroughly dried before reassembly.
- Reconnect the power supply and test the ice maker’s functionality.
Concluding Remarks
Successfully troubleshooting a malfunctioning ice maker often involves a combination of visual inspection, simple checks, and a methodical approach. By systematically addressing potential issues, from water supply problems to internal component malfunctions, you can effectively pinpoint the source of the problem and restore your ice maker’s functionality. Remember that preventative maintenance, such as regular cleaning and filter changes (where applicable), can significantly reduce the likelihood of future problems. With a little patience and these troubleshooting steps, you’ll be enjoying perfectly formed ice cubes in no time.