A clogged drain—the bane of every homeowner’s existence. From the subtle gurgle to the alarming overflow, a blocked drain disrupts daily life and can quickly escalate into a plumbing nightmare. But fear not! This guide provides a step-by-step approach to diagnosing and resolving common drain clogs, empowering you to tackle the problem head-on, saving time, money, and potentially a significant plumbing bill.
We’ll explore various techniques, from simple plungers and natural remedies to more advanced tools like drain augers and even p-trap disassembly. Whether your clog is caused by hair, grease, or something else entirely, we’ll equip you with the knowledge and strategies to effectively restore smooth-flowing drains throughout your home.
Identifying the Clog’s Location and Type
Understanding the location and type of clog is crucial for effective drain clearing. Different clog types require different approaches for removal, and pinpointing the location helps target your efforts. Ignoring these factors can lead to ineffective solutions and potentially worsen the problem.
Common locations for drain clogs in a home plumbing system include sinks (kitchen and bathroom), shower drains, bathtub drains, and toilet drains. The specific location often hints at the likely type of clog. For example, hair clogs are more prevalent in shower and bathroom sink drains, while grease clogs are commonly found in kitchen sinks.
Drain Clog Types and Characteristics
Various materials contribute to drain clogs, each with unique properties affecting their removal. Hair, grease, soap scum, and food scraps are common culprits, each requiring a slightly different approach to remediation. Understanding these differences is key to selecting the most appropriate clearing method.
| Clog Type | Appearance | Consistency | Likely Location |
|---|---|---|---|
| Hair | Tangled mass of hair, potentially mixed with other debris. May appear dark and matted. | Solid, fibrous, and somewhat resilient. | Shower drains, bathroom sinks |
| Grease | A thick, oily substance that may appear yellowish or whitish. Often clings to the pipe walls. | Semi-solid, sticky, and difficult to remove. | Kitchen sinks, garbage disposals |
| Soap Scum | A slimy, often whitish or grayish coating that builds up over time. | Soft, slippery, and easily broken apart. | Shower drains, bathroom sinks, bathtubs |
| Food Scraps | A mixture of various food particles, often including grease, vegetable matter, and other debris. | Variable, depending on the composition. Can range from soft and mushy to hard and compacted. | Kitchen sinks, garbage disposals |
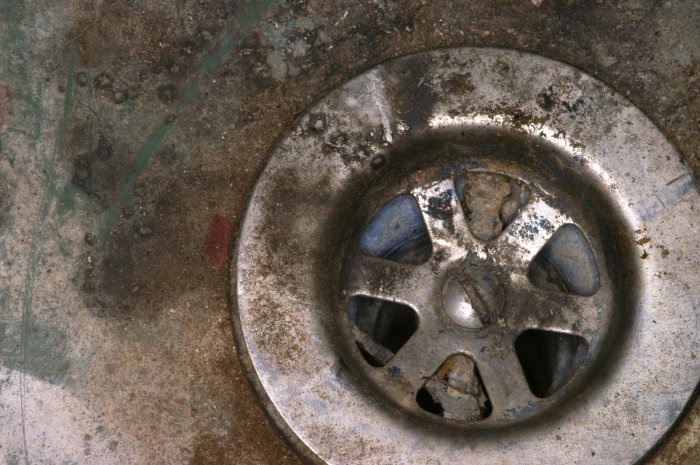
Visual Inspection of Drains
Before resorting to chemical drain cleaners or plumbing tools, a visual inspection can often reveal the clog’s nature and location. For sinks, remove the drain stopper or strainer to check for obvious blockages. For shower and tub drains, remove the drain cover if present. A flashlight can be helpful in illuminating the drain opening and providing a clearer view of any obstructions. Carefully examine the visible portion of the drainpipe for any visible clogs, paying close attention to the consistency and composition of the blockage. This initial visual inspection can save time and effort by allowing you to choose the most appropriate method for clearing the clog.
Basic Troubleshooting Techniques
Before resorting to more complex solutions, several basic techniques can often effectively clear a clogged drain. These methods are generally inexpensive, readily available, and require minimal specialized tools. Success depends largely on correctly identifying the clog’s location and type, as discussed previously.
Employing the right technique for your specific plumbing fixture is crucial. Improper use can worsen the clog or even damage your plumbing. The following sections detail the proper application of common drain-clearing methods.
Plunger Use for Different Drain Types
Using a plunger correctly is vital for effective clog removal. The type of plunger (cup or flange) and the technique used vary slightly depending on the drain type. A cup plunger works best for sinks and tubs, while a flange plunger, with its extra rubber flap, is designed for toilets.
For sinks and tubs, ensure the drain opening is fully covered by the plunger’s cup. Add enough water to cover the cup. Create a tight seal and then rapidly pump up and down. For toilets, ensure the flange covers the drain opening completely. Add enough water to partially cover the flange. Pump vigorously up and down, maintaining a tight seal throughout. Repeat the process until the clog clears. If the water level in the sink or tub doesn’t visibly drop, you may need to try another method.
Drain Snake Usage
A drain snake, also known as a plumber’s snake, is a flexible tool with a coiled end that can reach and break up or retrieve clogs further down the drainpipe. This is particularly useful for stubborn clogs that a plunger can’t dislodge.
The following steps Artikel the proper use of a drain snake:
- Carefully insert the snake into the drain opening, rotating it gently as you push it further down.
- Feel for resistance. This indicates you’ve encountered the clog.
- Once resistance is met, continue to rotate and push the snake, attempting to break up or hook the clog.
- Once you feel the resistance lessen or the clog breaks up, slowly retract the snake, while still rotating it to remove any debris that may be clinging to it.
- Check the end of the snake for any retrieved clog material.
- Flush the drain with hot water to ensure the clog is completely removed.
- If the clog persists, repeat the process or consider alternative methods.
Baking Soda and Vinegar Solution
Baking soda and vinegar offer a natural, relatively inexpensive way to clear minor clogs. The chemical reaction between the two creates carbon dioxide gas, which helps to break up and dislodge the clog. This method is most effective for organic clogs, such as hair or grease.
The effectiveness of this method depends on the severity and type of clog. It is generally less effective for severe or mineral-based clogs. The reaction is:
NaHCO3 (baking soda) + CH3COOH (vinegar) → CH3COONa (sodium acetate) + H2O (water) + CO2 (carbon dioxide)
A flowchart illustrating the steps is as follows:
Flowchart: Baking Soda and Vinegar Drain Cleaning
(Imagine a flowchart here. The flowchart would start with “Pour 1 cup of baking soda down the drain,” leading to “Pour 1 cup of vinegar down the drain,” leading to “Wait 30-60 minutes,” leading to “Flush with hot water,” leading to “Clog cleared?” If yes, end. If no, try another method.)
Advanced Techniques and Tools

When basic troubleshooting fails, more advanced techniques and tools may be necessary to effectively clear stubborn drain clogs. These methods offer increased power and precision, allowing for the removal of clogs that resist simpler approaches. Proper use of these tools is crucial to avoid damaging your plumbing system.
Drain Auger (Electric Snake) vs. Manual Drain Snake
The choice between an electric drain auger (often called a “snake”) and a manual drain snake depends on the severity of the clog and your comfort level with plumbing tools. Electric augers offer significant advantages in terms of power and reach, making them ideal for tackling deep or stubborn clogs. However, manual snakes are more affordable and can be sufficient for less severe blockages.
| Tool | Power Source | Effectiveness | Cost |
|---|---|---|---|
| Manual Drain Snake | Manual | Effective for minor clogs; limited reach and power. | Low |
| Electric Drain Auger | Electric | Highly effective for severe clogs; greater reach and power; can navigate complex drain systems. | High |
Wet/Dry Vacuum Use for Drain Clearing
A wet/dry vacuum can be a valuable tool for removing standing water from a clogged drain, creating space for other methods to work more effectively. Furthermore, the suction power can sometimes dislodge loose clogs. Before using the vacuum, ensure it’s properly equipped with a suitable attachment for drain cleaning. Carefully position the vacuum nozzle over the drain opening, ensuring a tight seal to maximize suction. Turn the vacuum on and allow it to work for several minutes, periodically checking for progress. This method is most effective for relatively loose or superficial clogs.
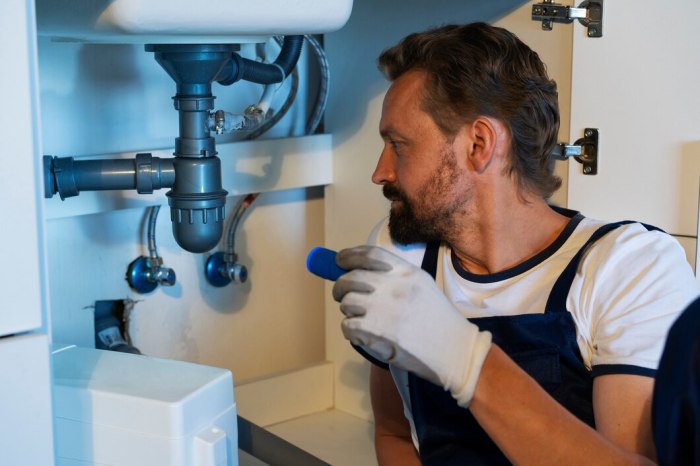
P-Trap Disassembly and Cleaning
The P-trap, the curved pipe under your sink or other plumbing fixtures, is a common location for clogs. Disassembling it allows for direct access to the clog for removal. Before starting, place a bucket beneath the P-trap to catch any residual water. Remember to turn off the water supply to the fixture before proceeding.
- Step 1: Locate the P-trap. The P-trap is usually located under the sink or fixture. It’s a curved pipe designed to trap debris and prevent sewer gases from entering the home.
- Step 2: Place a bucket underneath. Position a bucket under the P-trap to catch any remaining water. This prevents spills and keeps the area clean.
- Step 3: Gather tools. You’ll need adjustable pliers or basin wrenches to loosen the slip nuts connecting the P-trap to the drain pipes. Old towels or rags can help protect the surrounding area from scratches.
- Step 4: Loosen the slip nuts. Carefully loosen the slip nuts connecting the P-trap to the drain pipes using the adjustable pliers or basin wrench. Turn the nuts counterclockwise to loosen them.
- Step 5: Remove the P-trap. Once the slip nuts are loosened, carefully remove the P-trap from the drain pipes. Be prepared for some water spillage, as the P-trap typically contains some standing water.
- Step 6: Clean the P-trap. Inspect the P-trap for clogs. Remove any debris such as hair, soap scum, or other obstructions. You can use a wire brush or other suitable tool to remove stubborn clogs. Rinse the P-trap thoroughly.
- Step 7: Reassemble the P-trap. Carefully reassemble the P-trap, ensuring a tight seal. Tighten the slip nuts by hand initially, then use the pliers or wrench to ensure a secure connection. Avoid over-tightening.
- Step 8: Turn the water back on. Once the P-trap is securely reassembled, turn the water supply back on and check for any leaks.
Epilogue
Successfully navigating a clogged drain is a rewarding experience, a testament to your problem-solving skills and resourcefulness. By understanding the different types of clogs, employing appropriate techniques, and understanding when to call for professional assistance, you’ve taken a significant step towards maintaining a well-functioning plumbing system. Remember, prevention is key! Regular maintenance, such as using drain strainers and avoiding pouring grease down the drain, can significantly reduce the likelihood of future clogs.